Setup CDR for AWS manually
Overview
In this lab will we will be using the existing CloudTrail created from the Setup DfAWS Cloud Formation Lab which must be done first. We will manually create a role and SNS topic.
Notes
A max of 5 Trails can be setup per AWS region
The Trail should be enabled at the org level
The first Trail is free
Anywhere you see initials your initials should be used as the value
Gather values for DfAWS Data Source
When you run the Cloud Formation Template (CFT) for DfAWS you will need the bucket name and region.
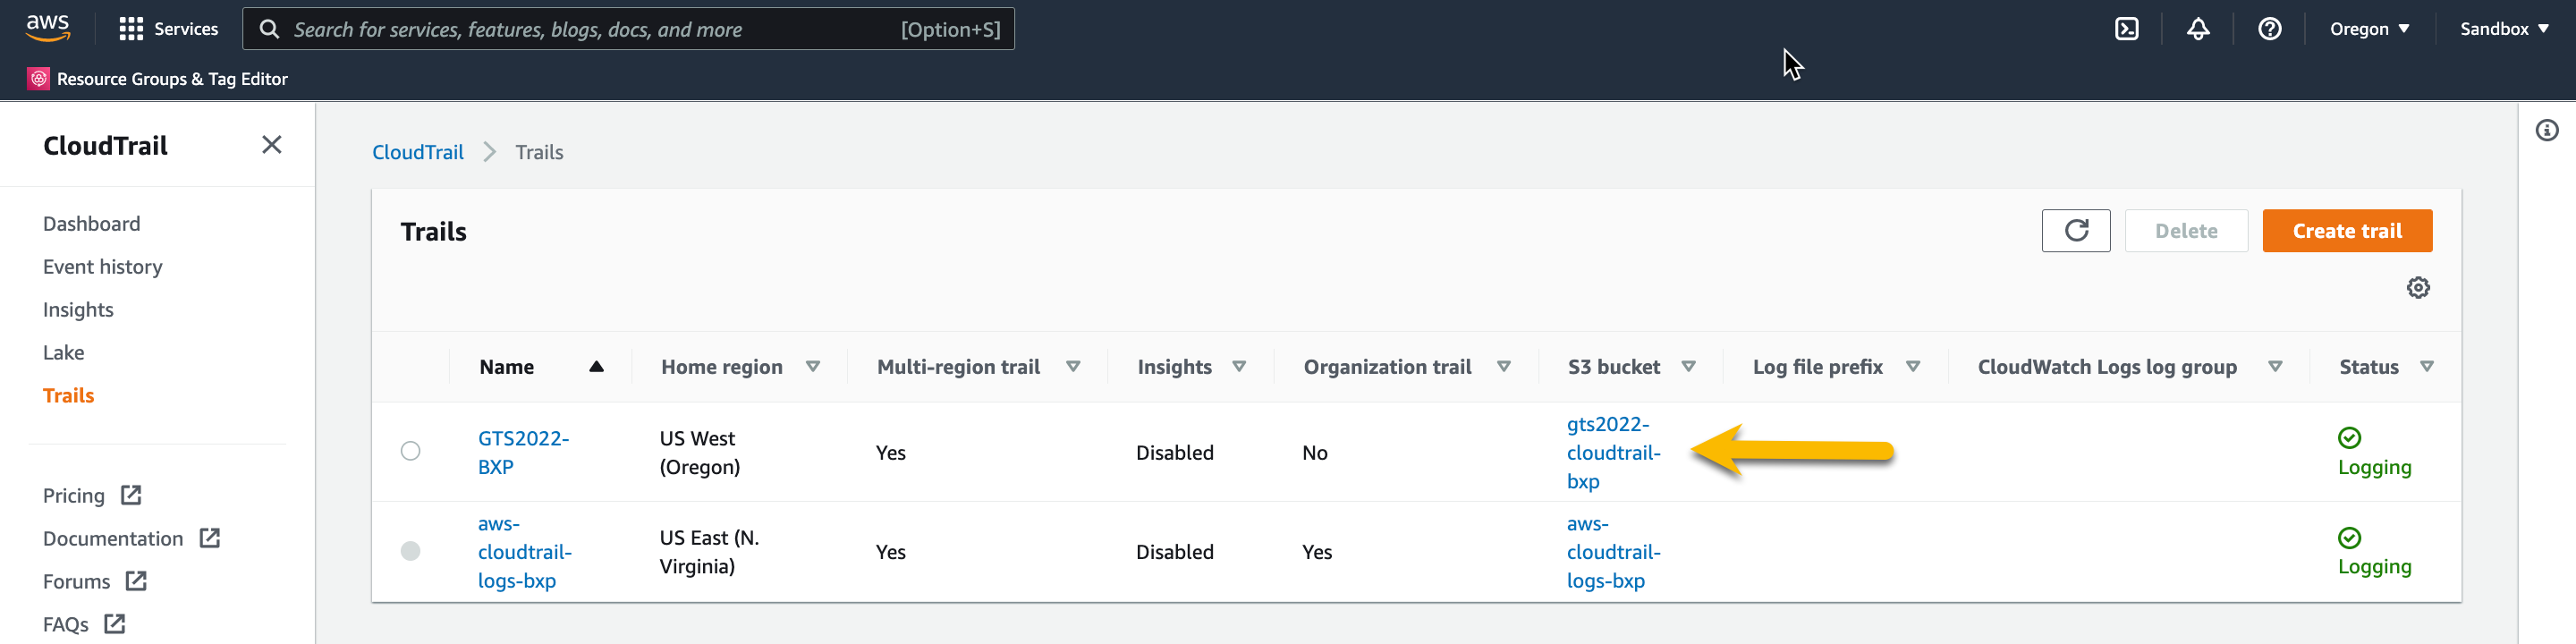
To get this, go back to your Trails page in the AWS Management Console.
Make note of the S3 bucket name and click the S3 bucket name
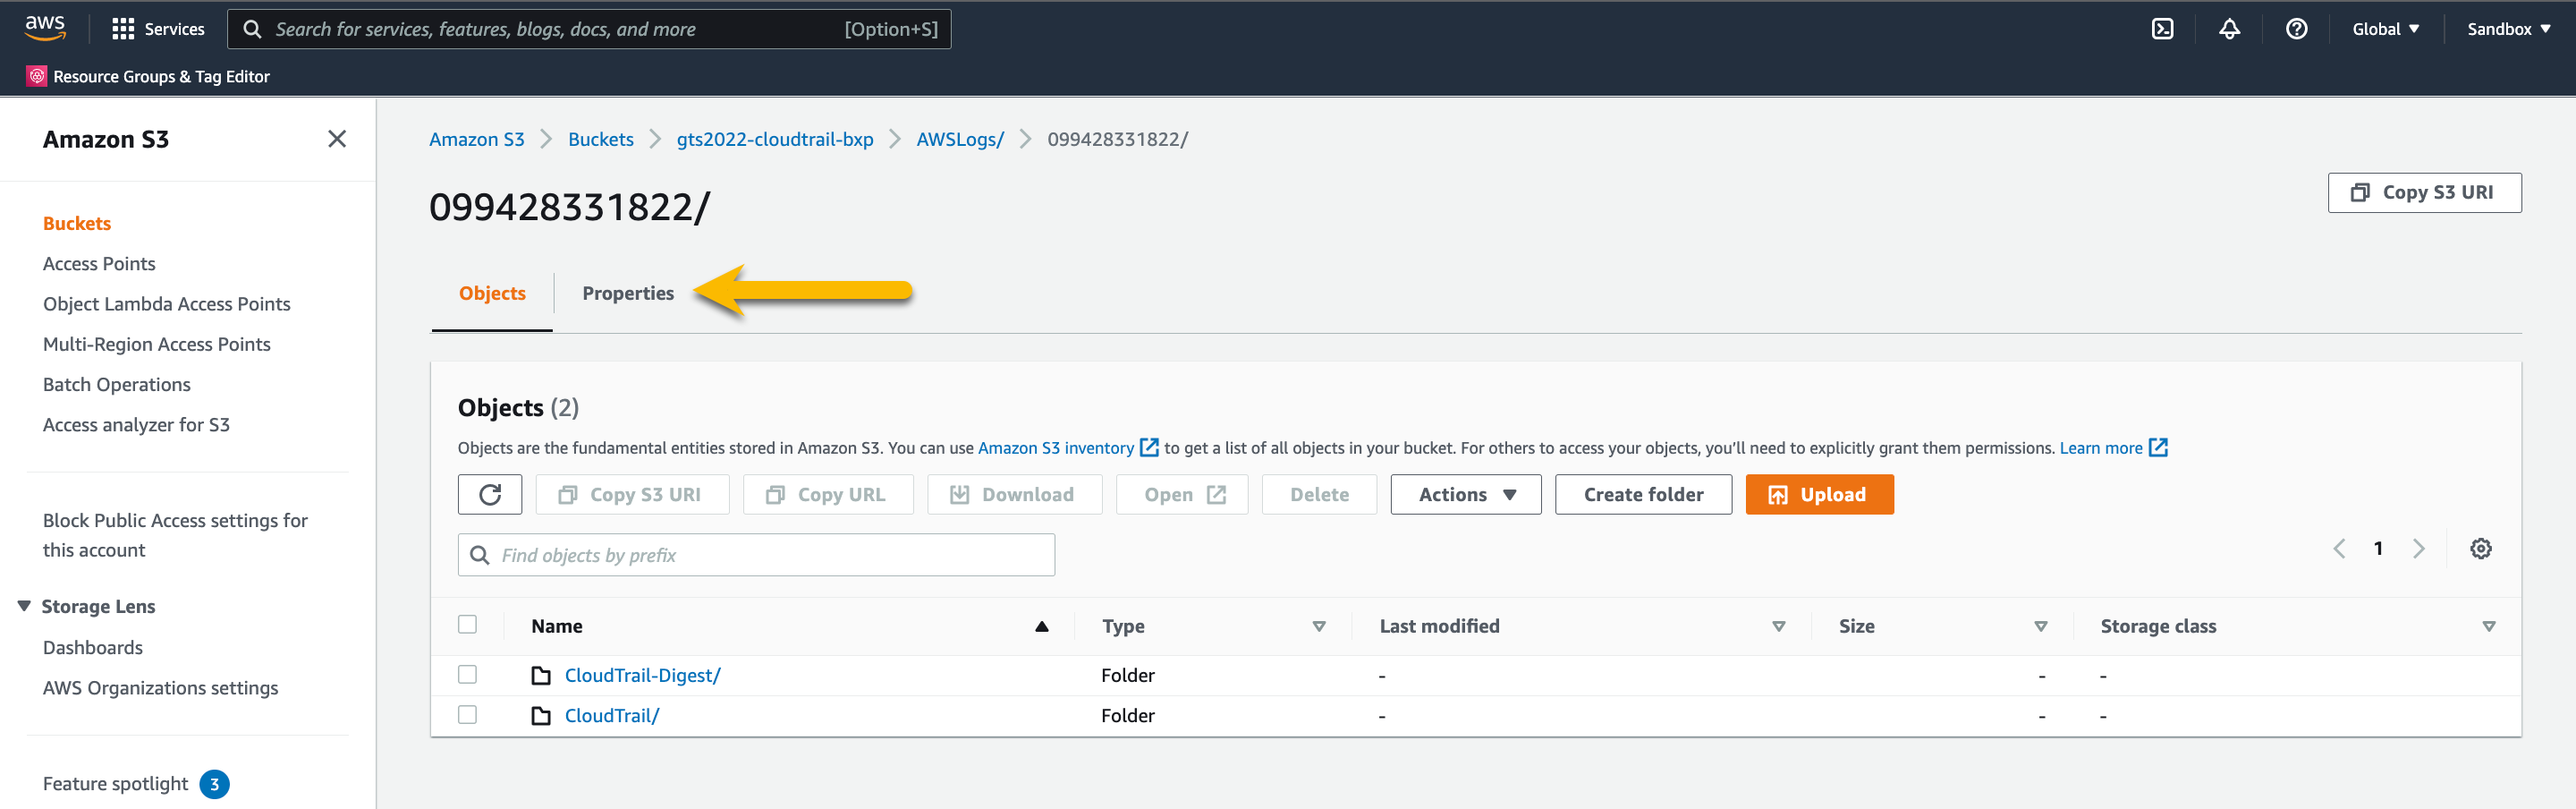
Press the Properties
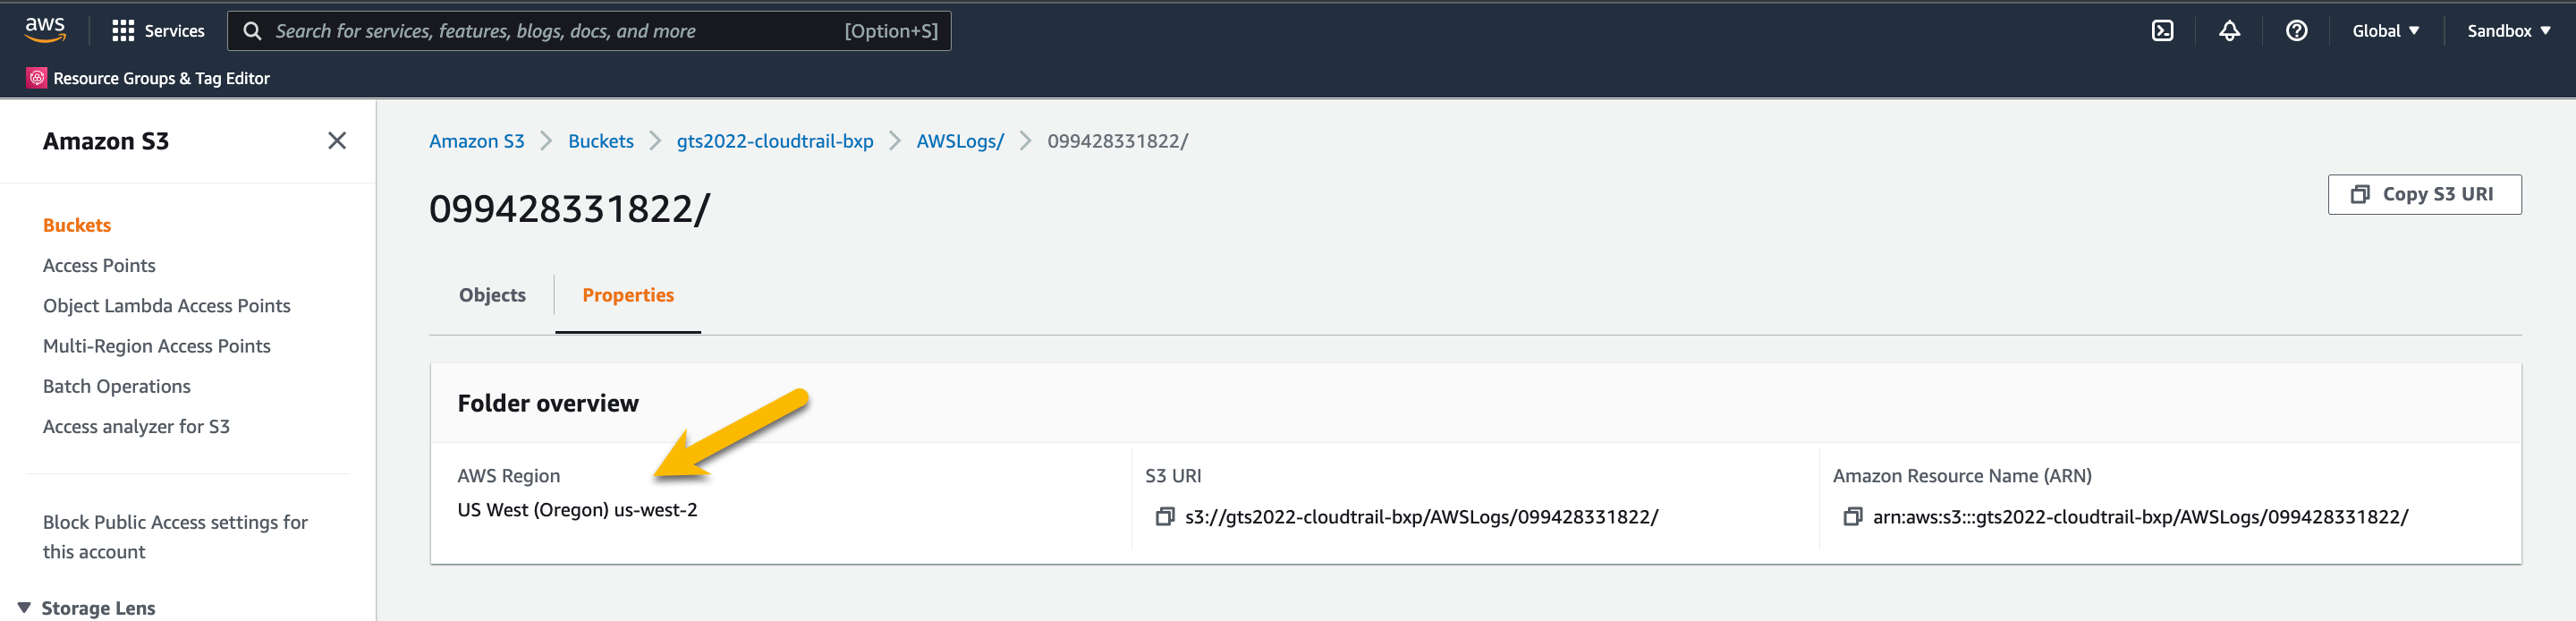
Make note of the AWS Region
Delete original DfAWS Data Source
Logon to the DfAWS instance with SSO.
Note: Do NOT use you static username and password. The SSO accounts have been given admin privileges within DfAWS.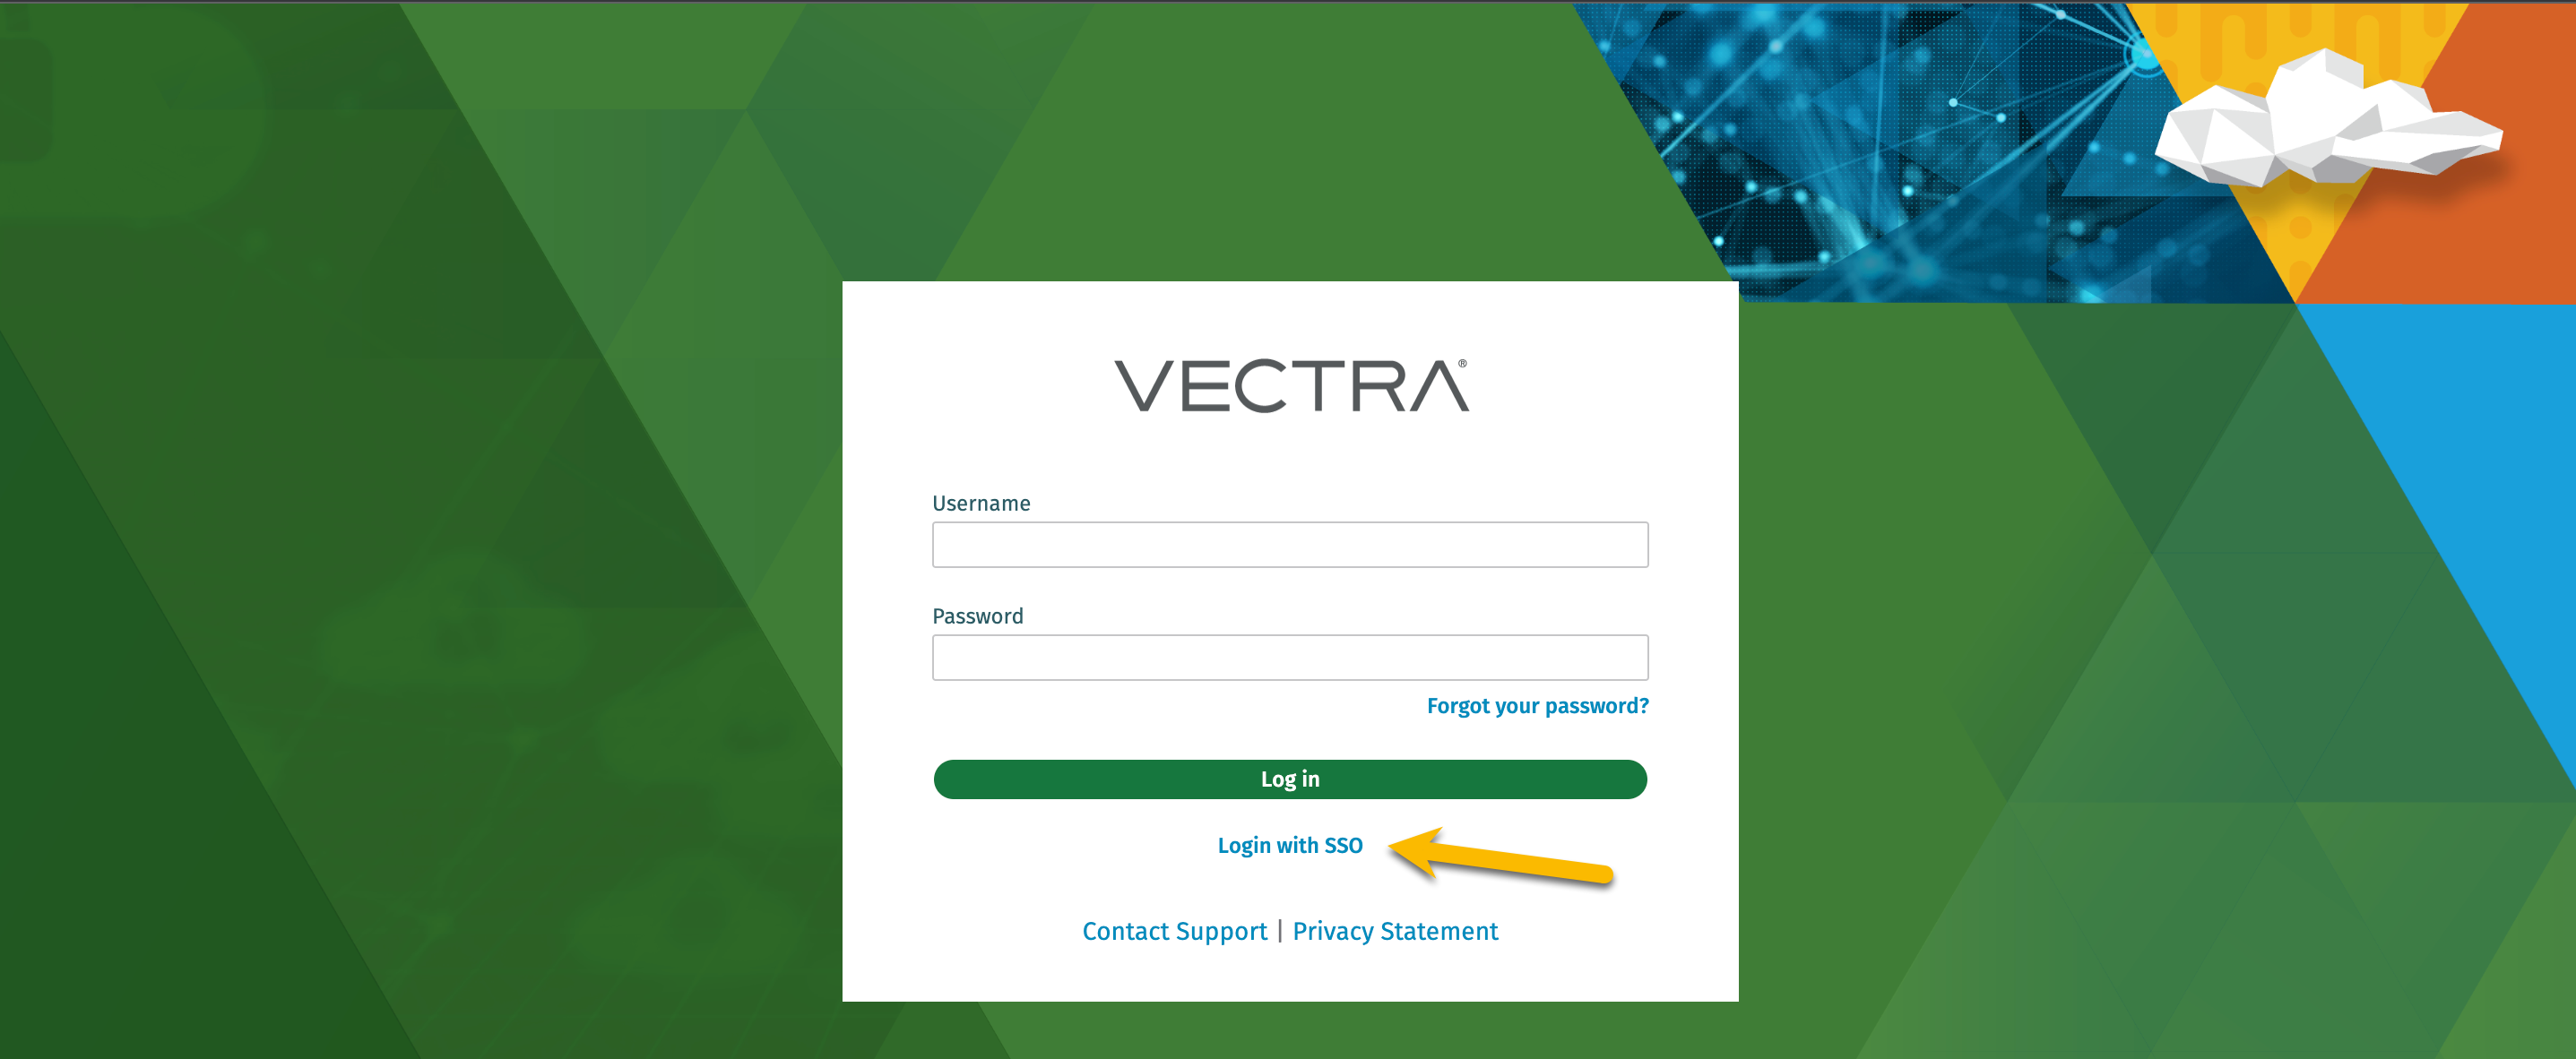
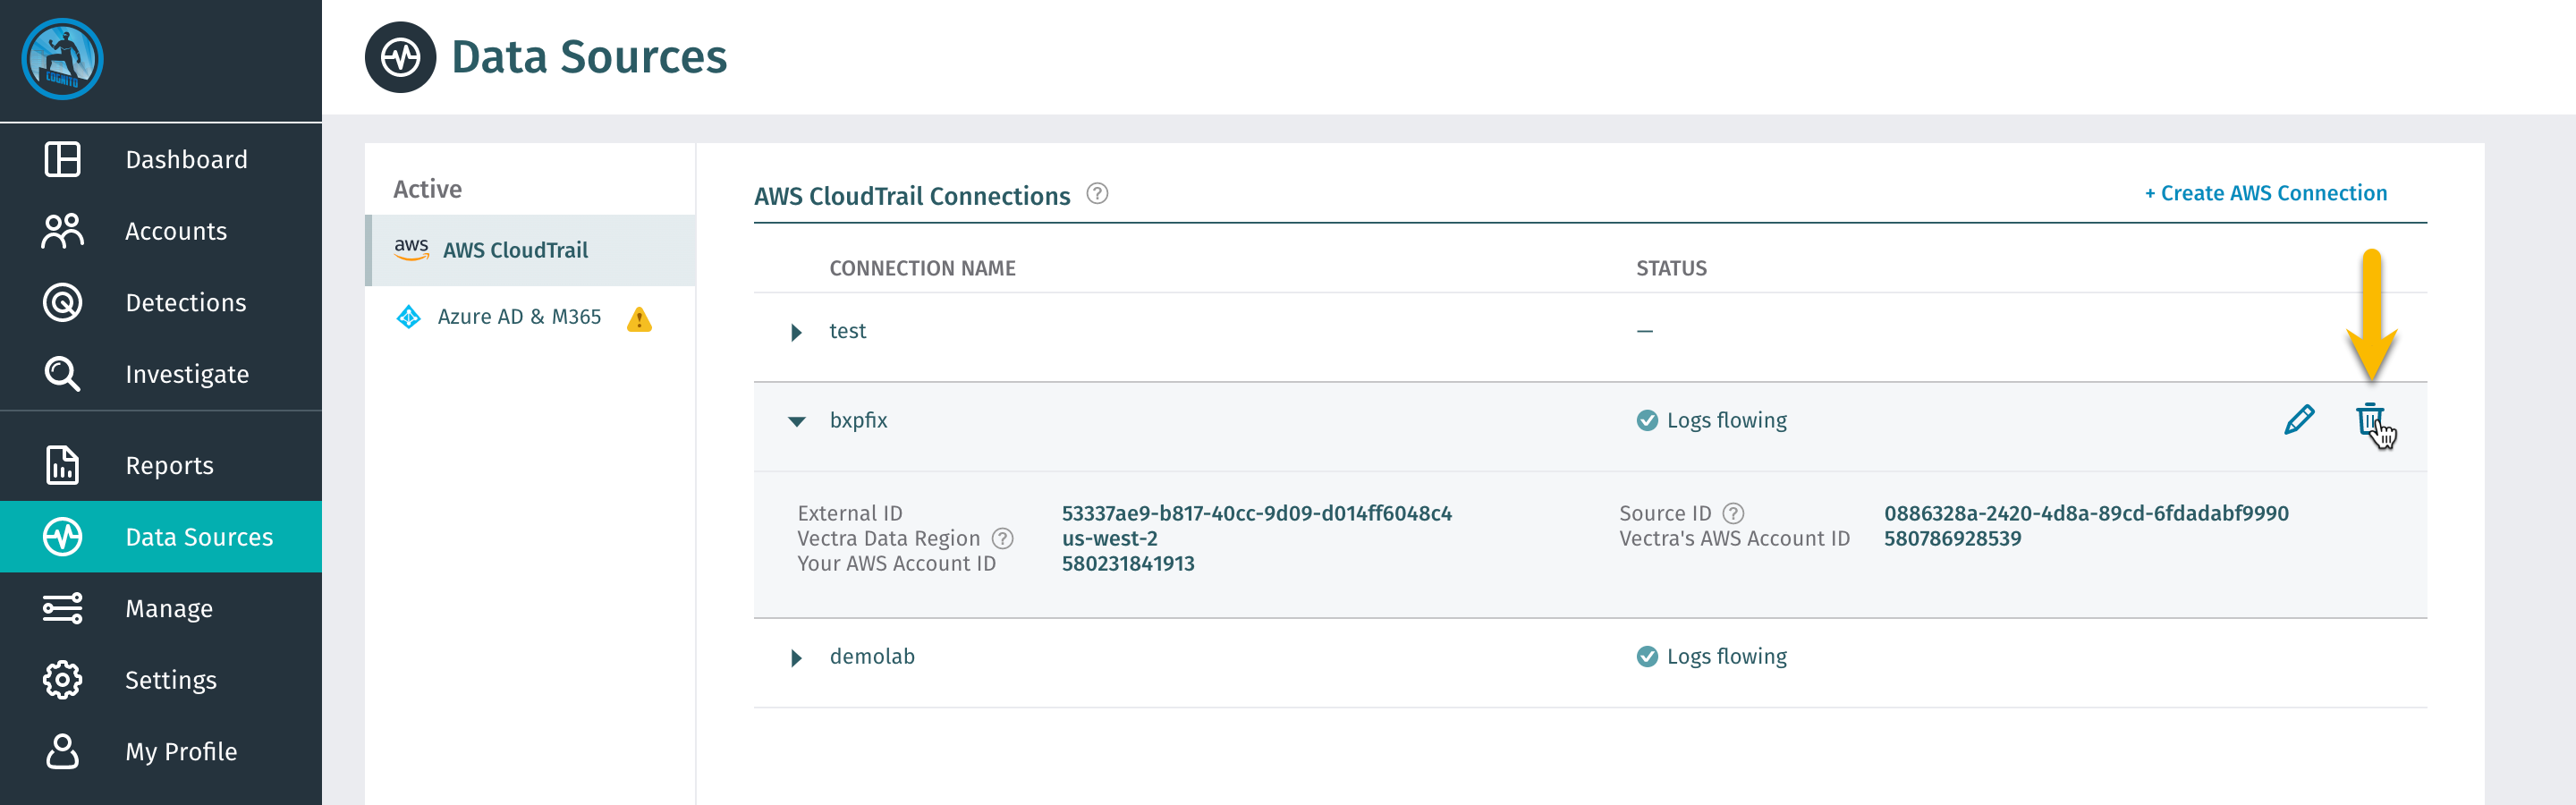
On the left navigation bar choose Data Sources, then click the “Trash Bin” next to your originally created connection from the Setup DfAWS Cloud Formation Lab.
Setup a new DfAWS Data Source
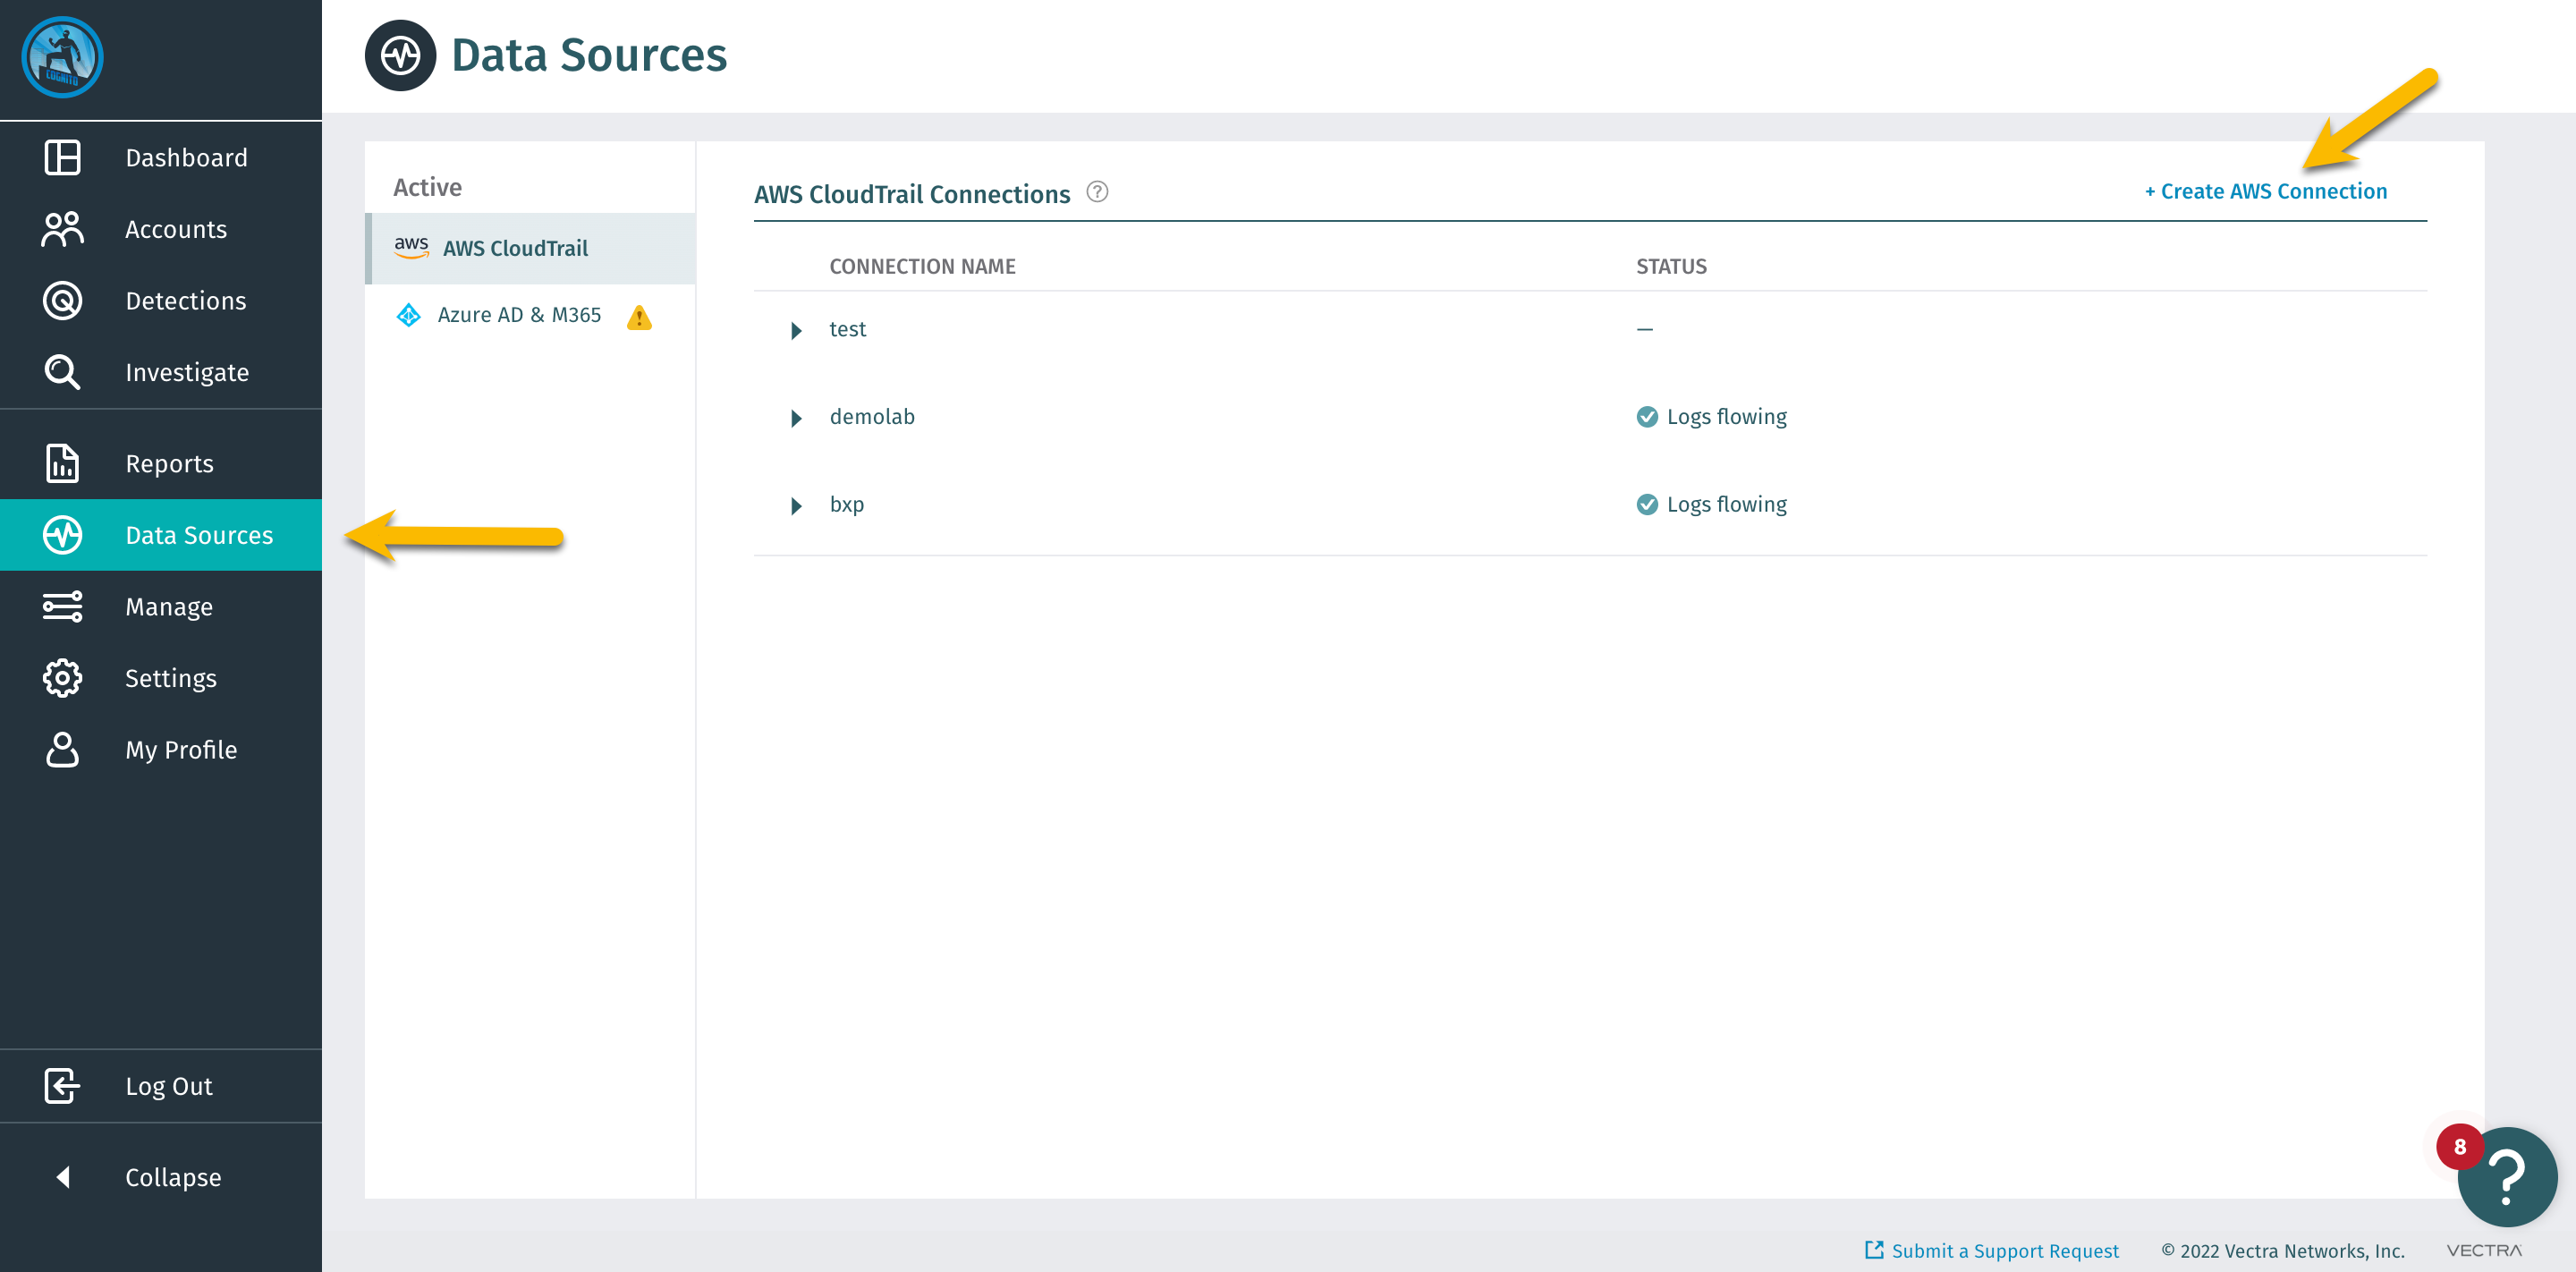
Once the original is deleted we can create our new Data Source.
In the DfAWS instance, on the top right press + Create AWS Connection
Name the connection gts2022-manual-initials and click Create & Continue
Make sure you are still logged into your personal AWS account
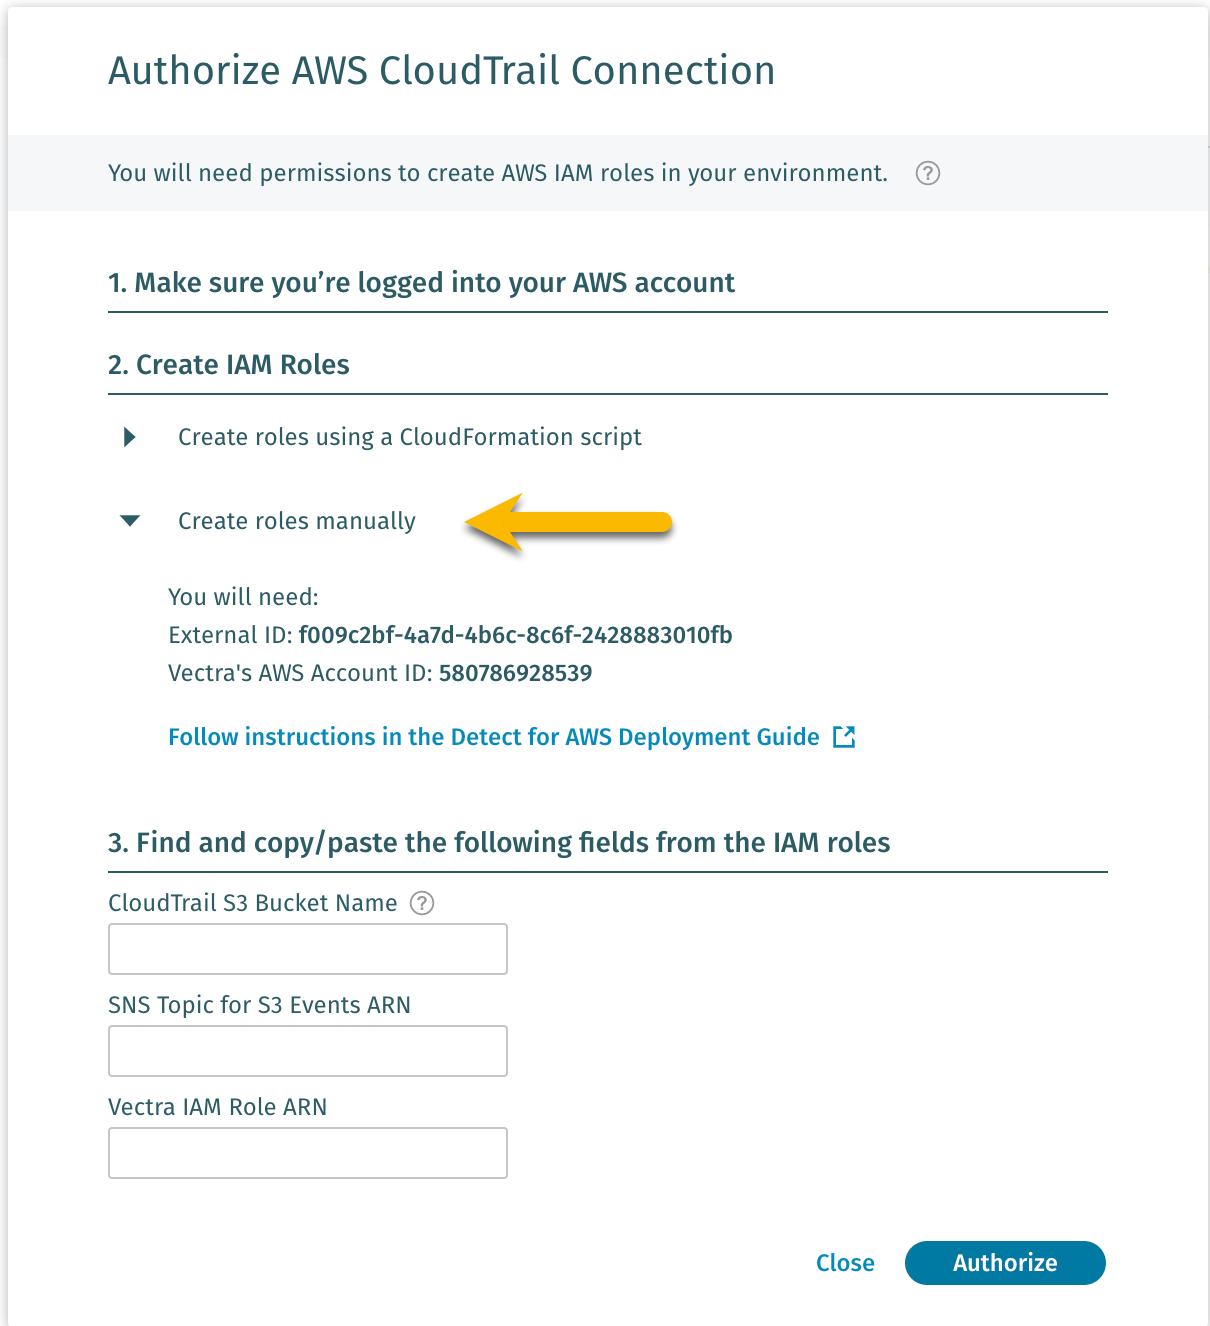
Create IAM Roles
Create roles manually
External ID - Take Note of the External ID
Vectra AWS Account ID - Take Note of the Account ID
Create SNS Topic
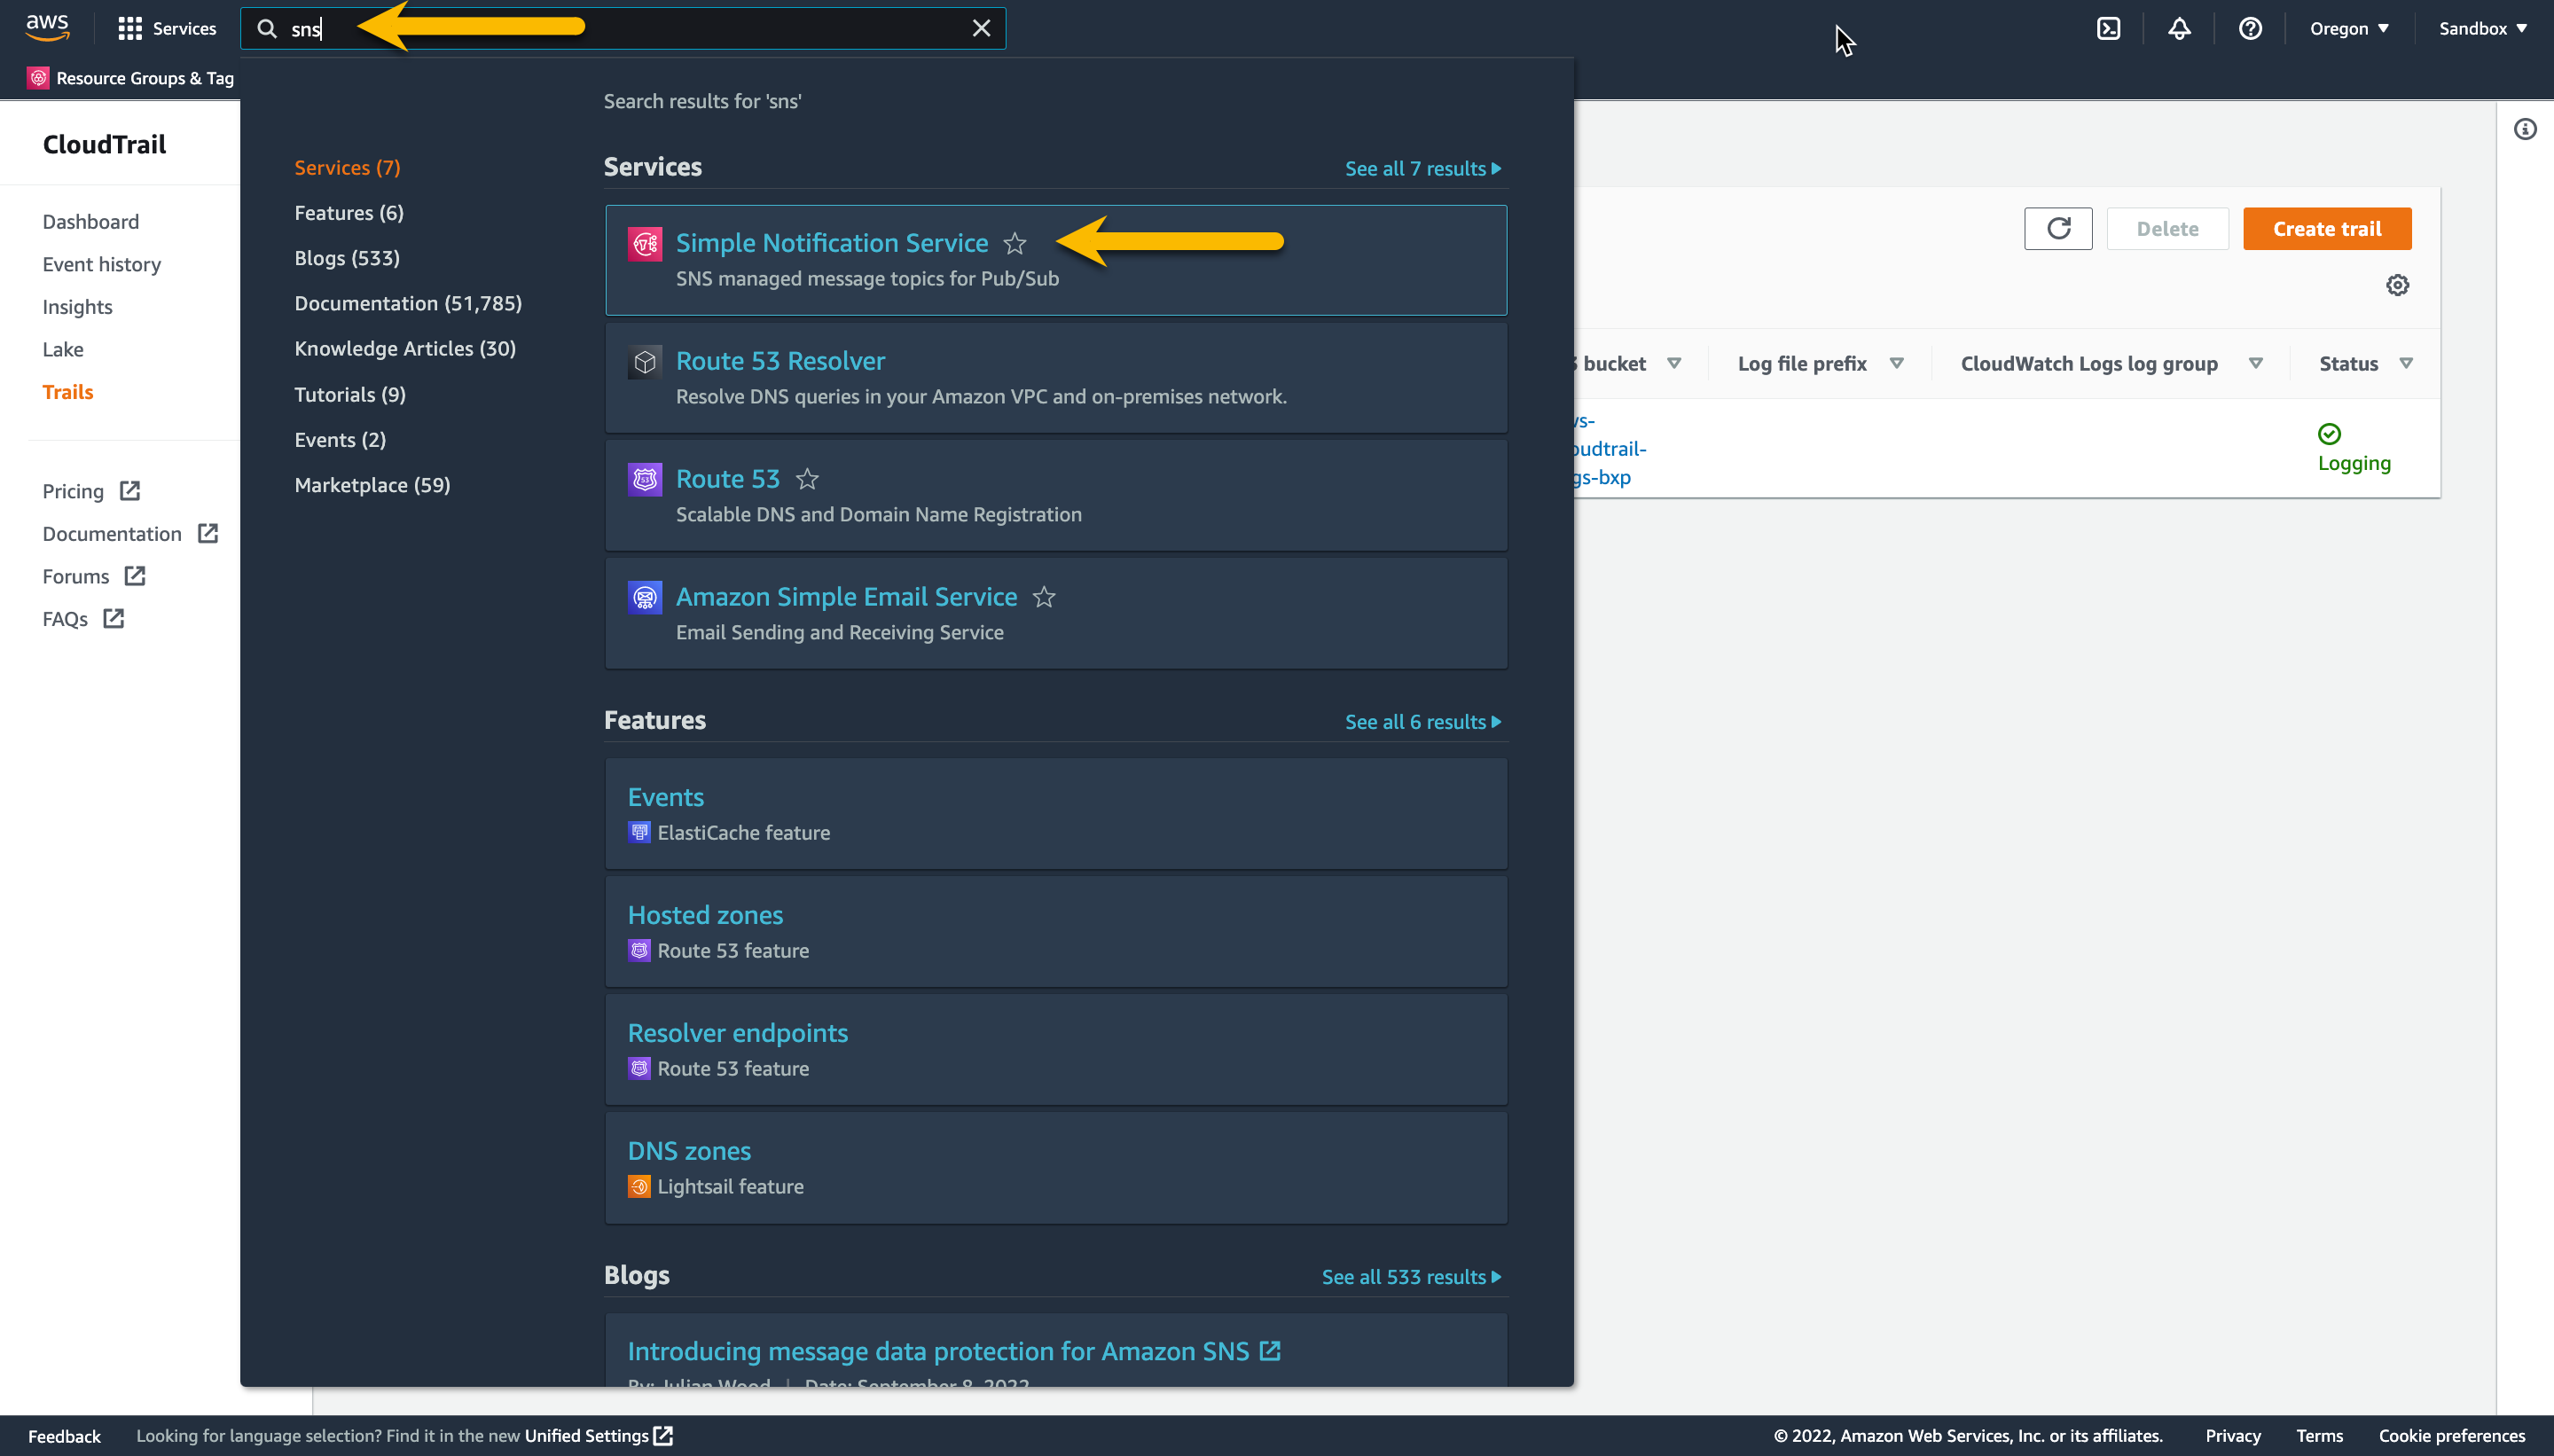
In the AWS Management Console navigate to the Simple Notification Service page by typing sns in the search field.
Verify you are in same region as your S3 bucket
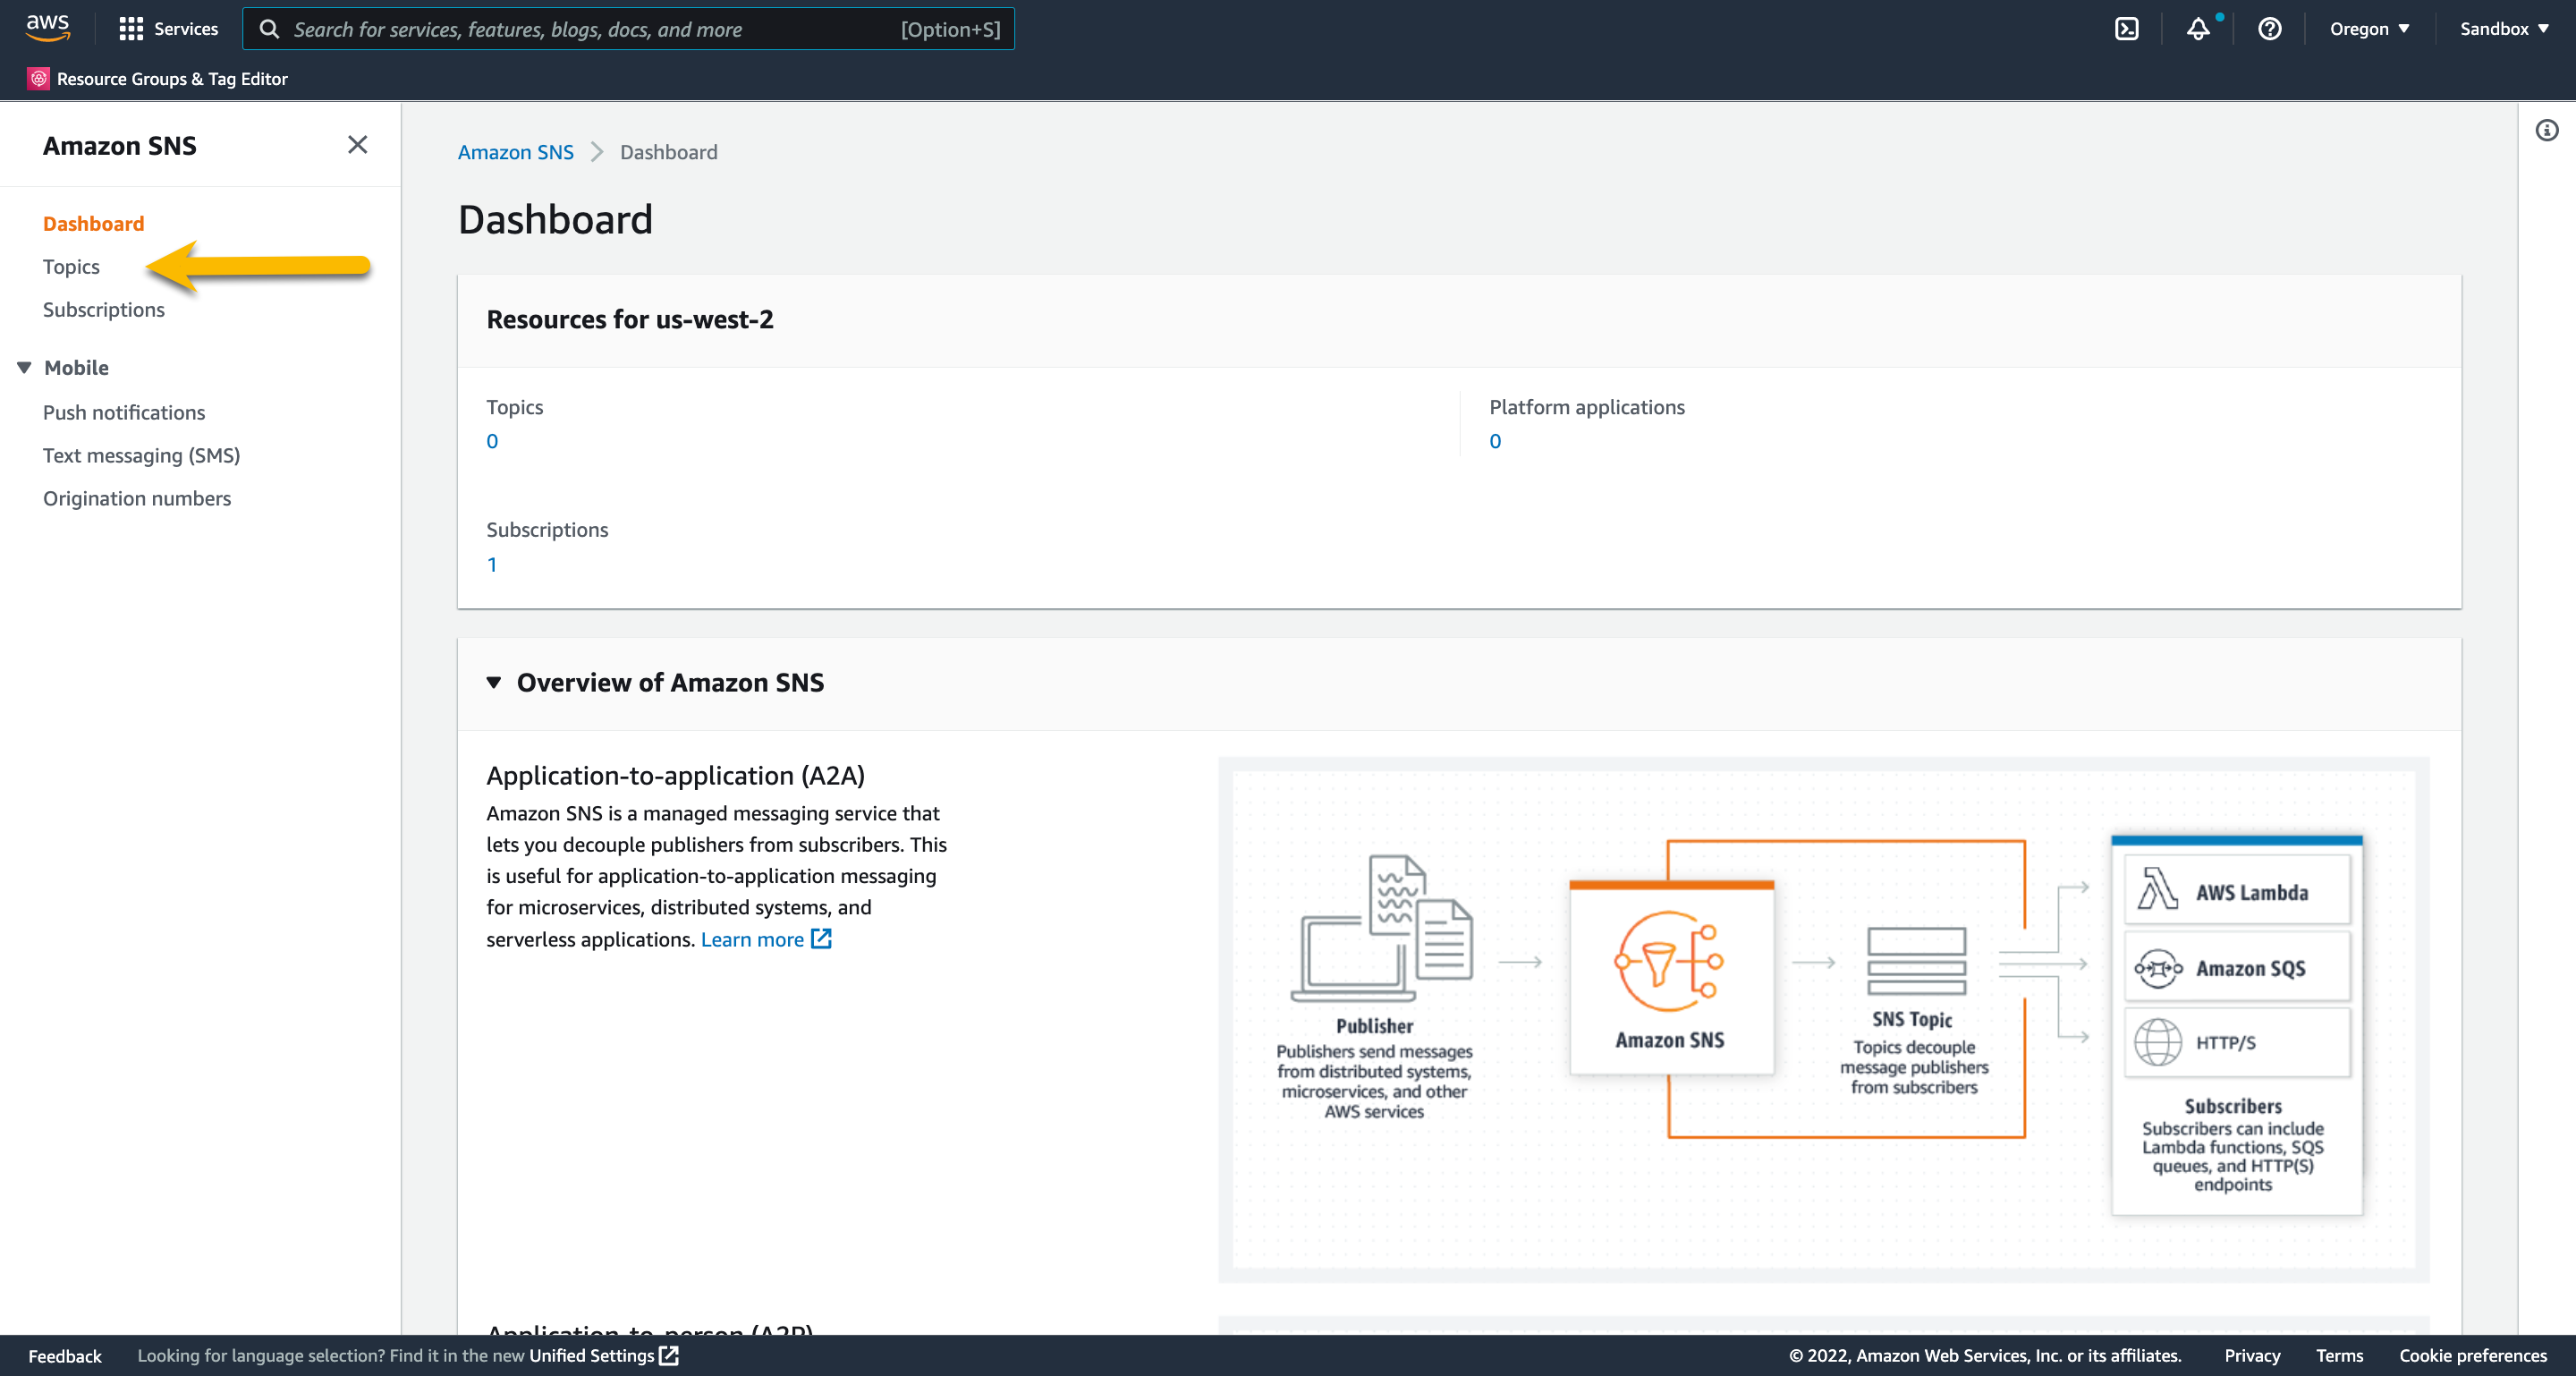
On the SNS page select topics on the left
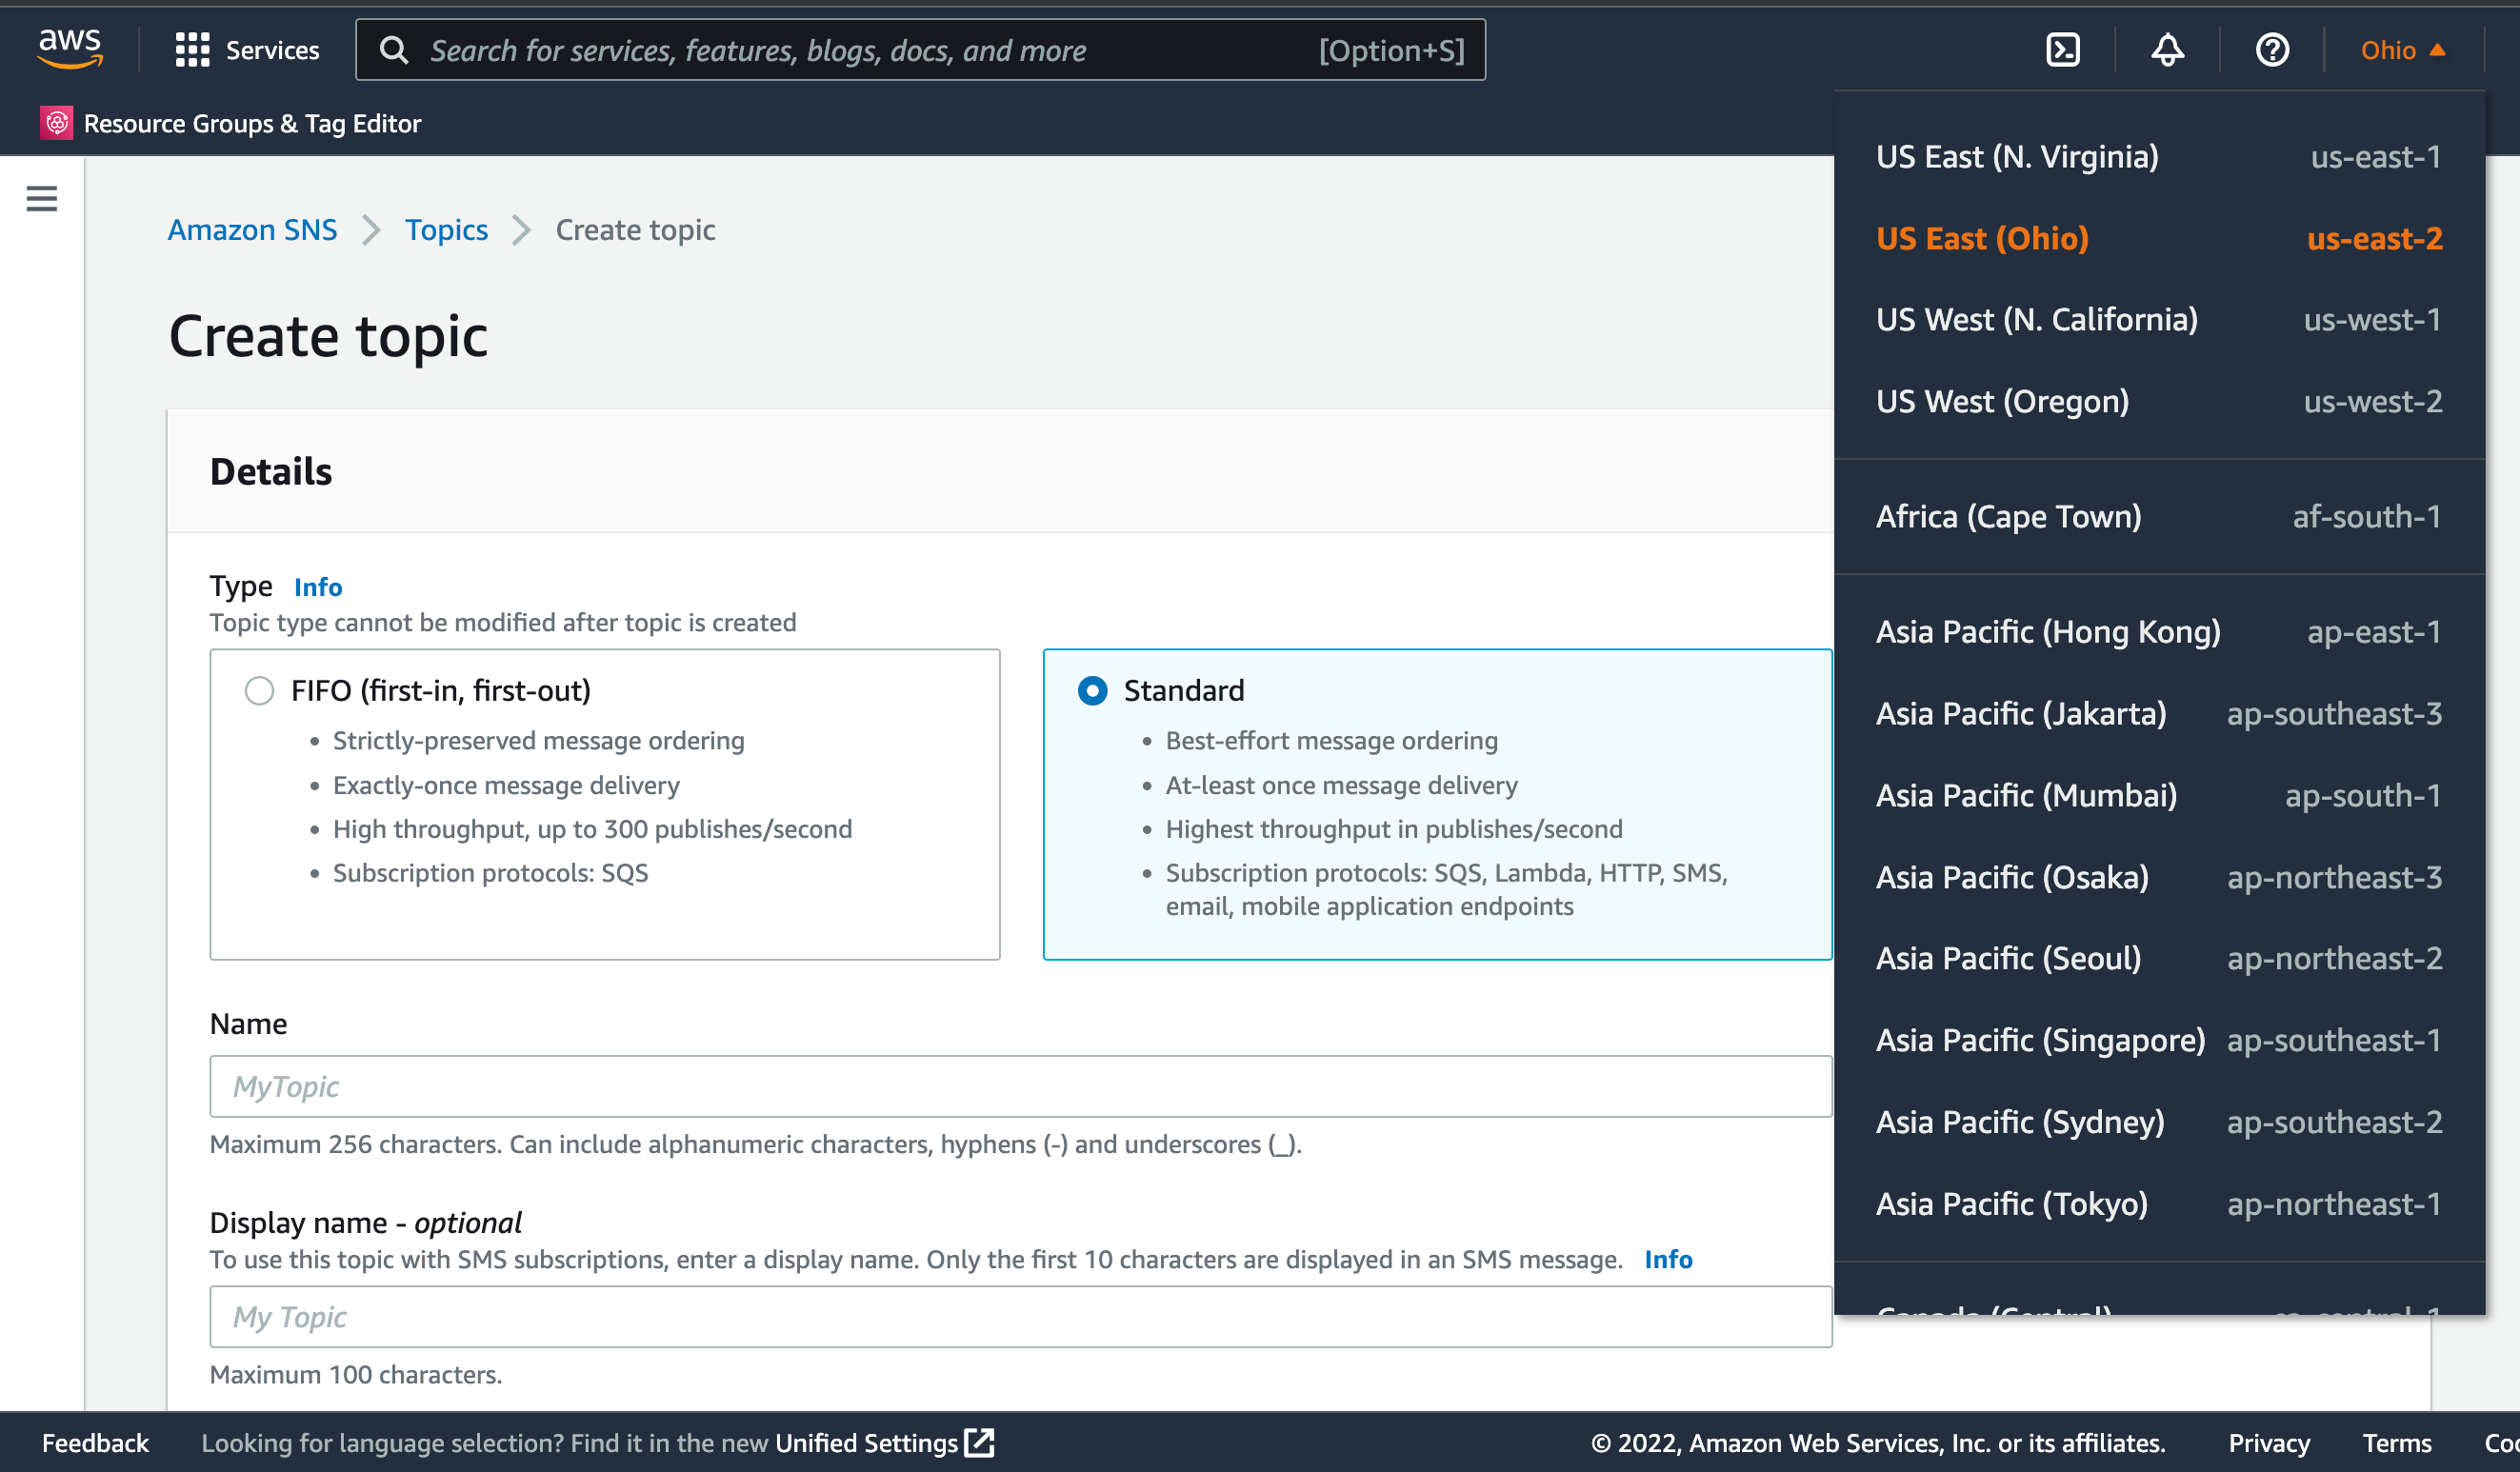
On the Topics page click Create topic on the right.
Fill in the following values, and click Create topic:
Type - Standard
Topic name - gts-topic-initials
Encryption - Disabled
Access Policy
Advanced - Selected
Remove the sample policy and paste in the below JSON
{
"Version": "2012-10-17",
"Id": "SNSPolicyDocument",
"Statement": [
    {
    "Sid": "allowS3ToPublish",
    "Effect": "Allow",
    "Principal": {
        "Service": "s3.amazonaws.com"
    },
    "Action": "sns:Publish",
    "Resource": "*"
    }
]
}

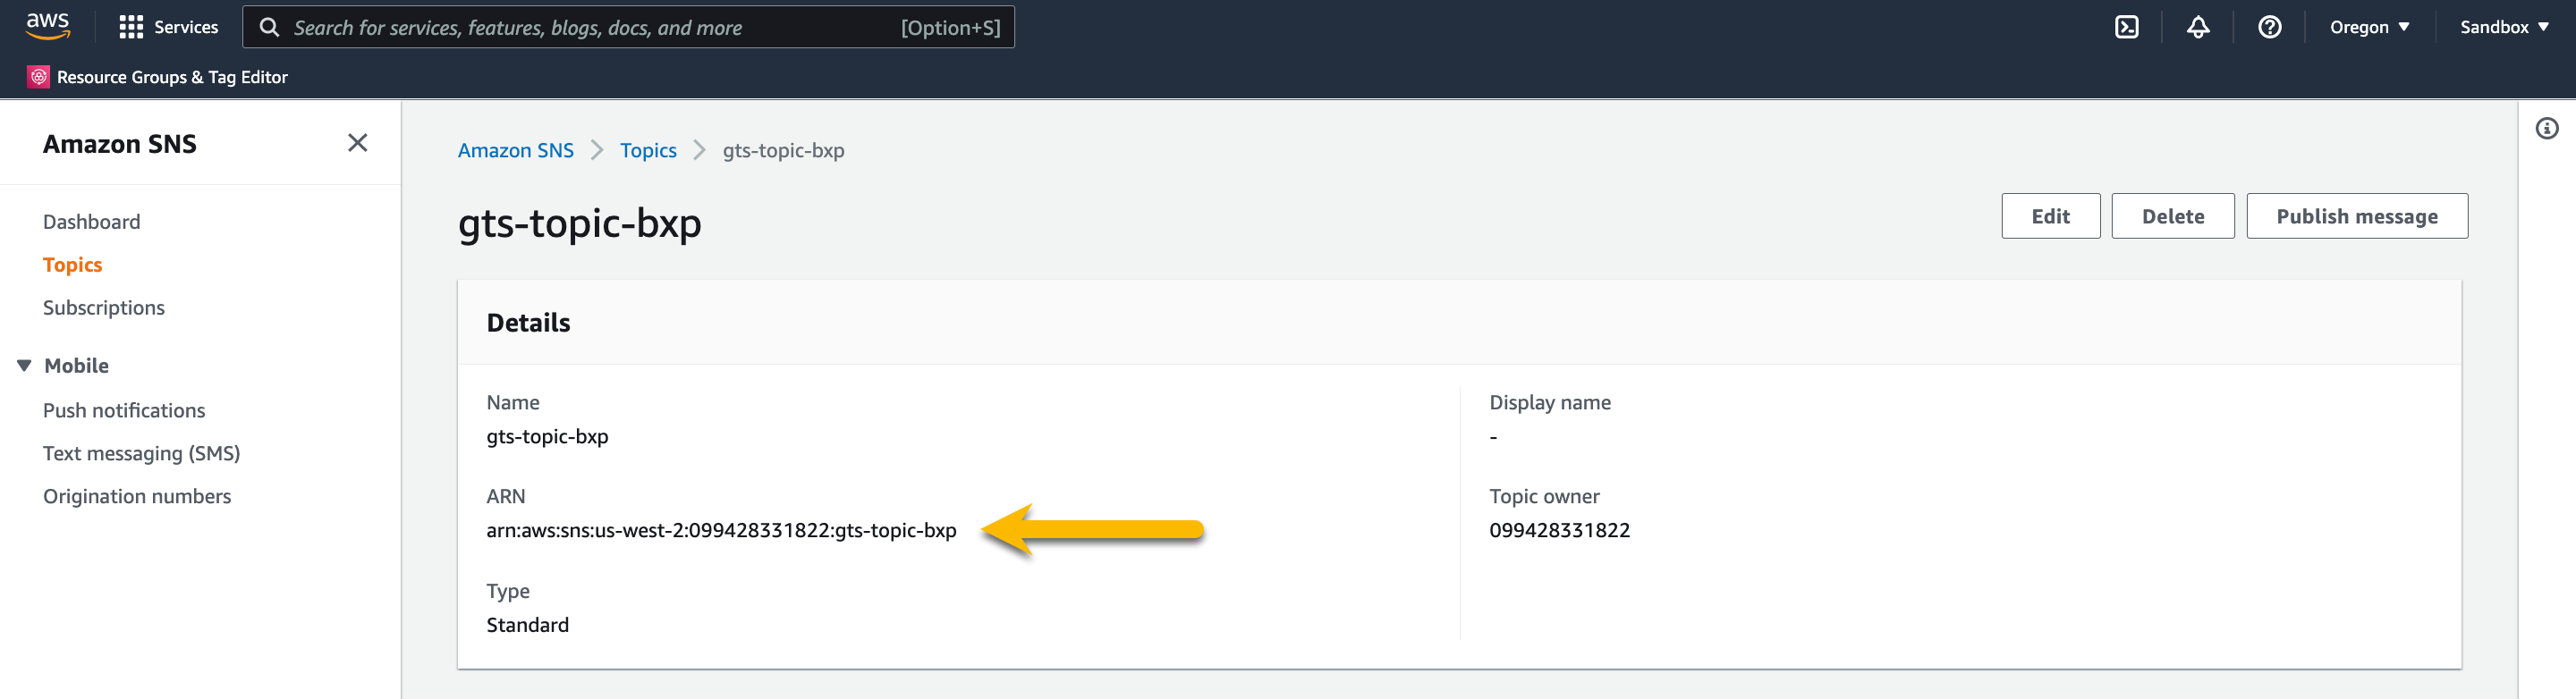
Copy the SNS ARN to your notes
Create AWS IAM Role
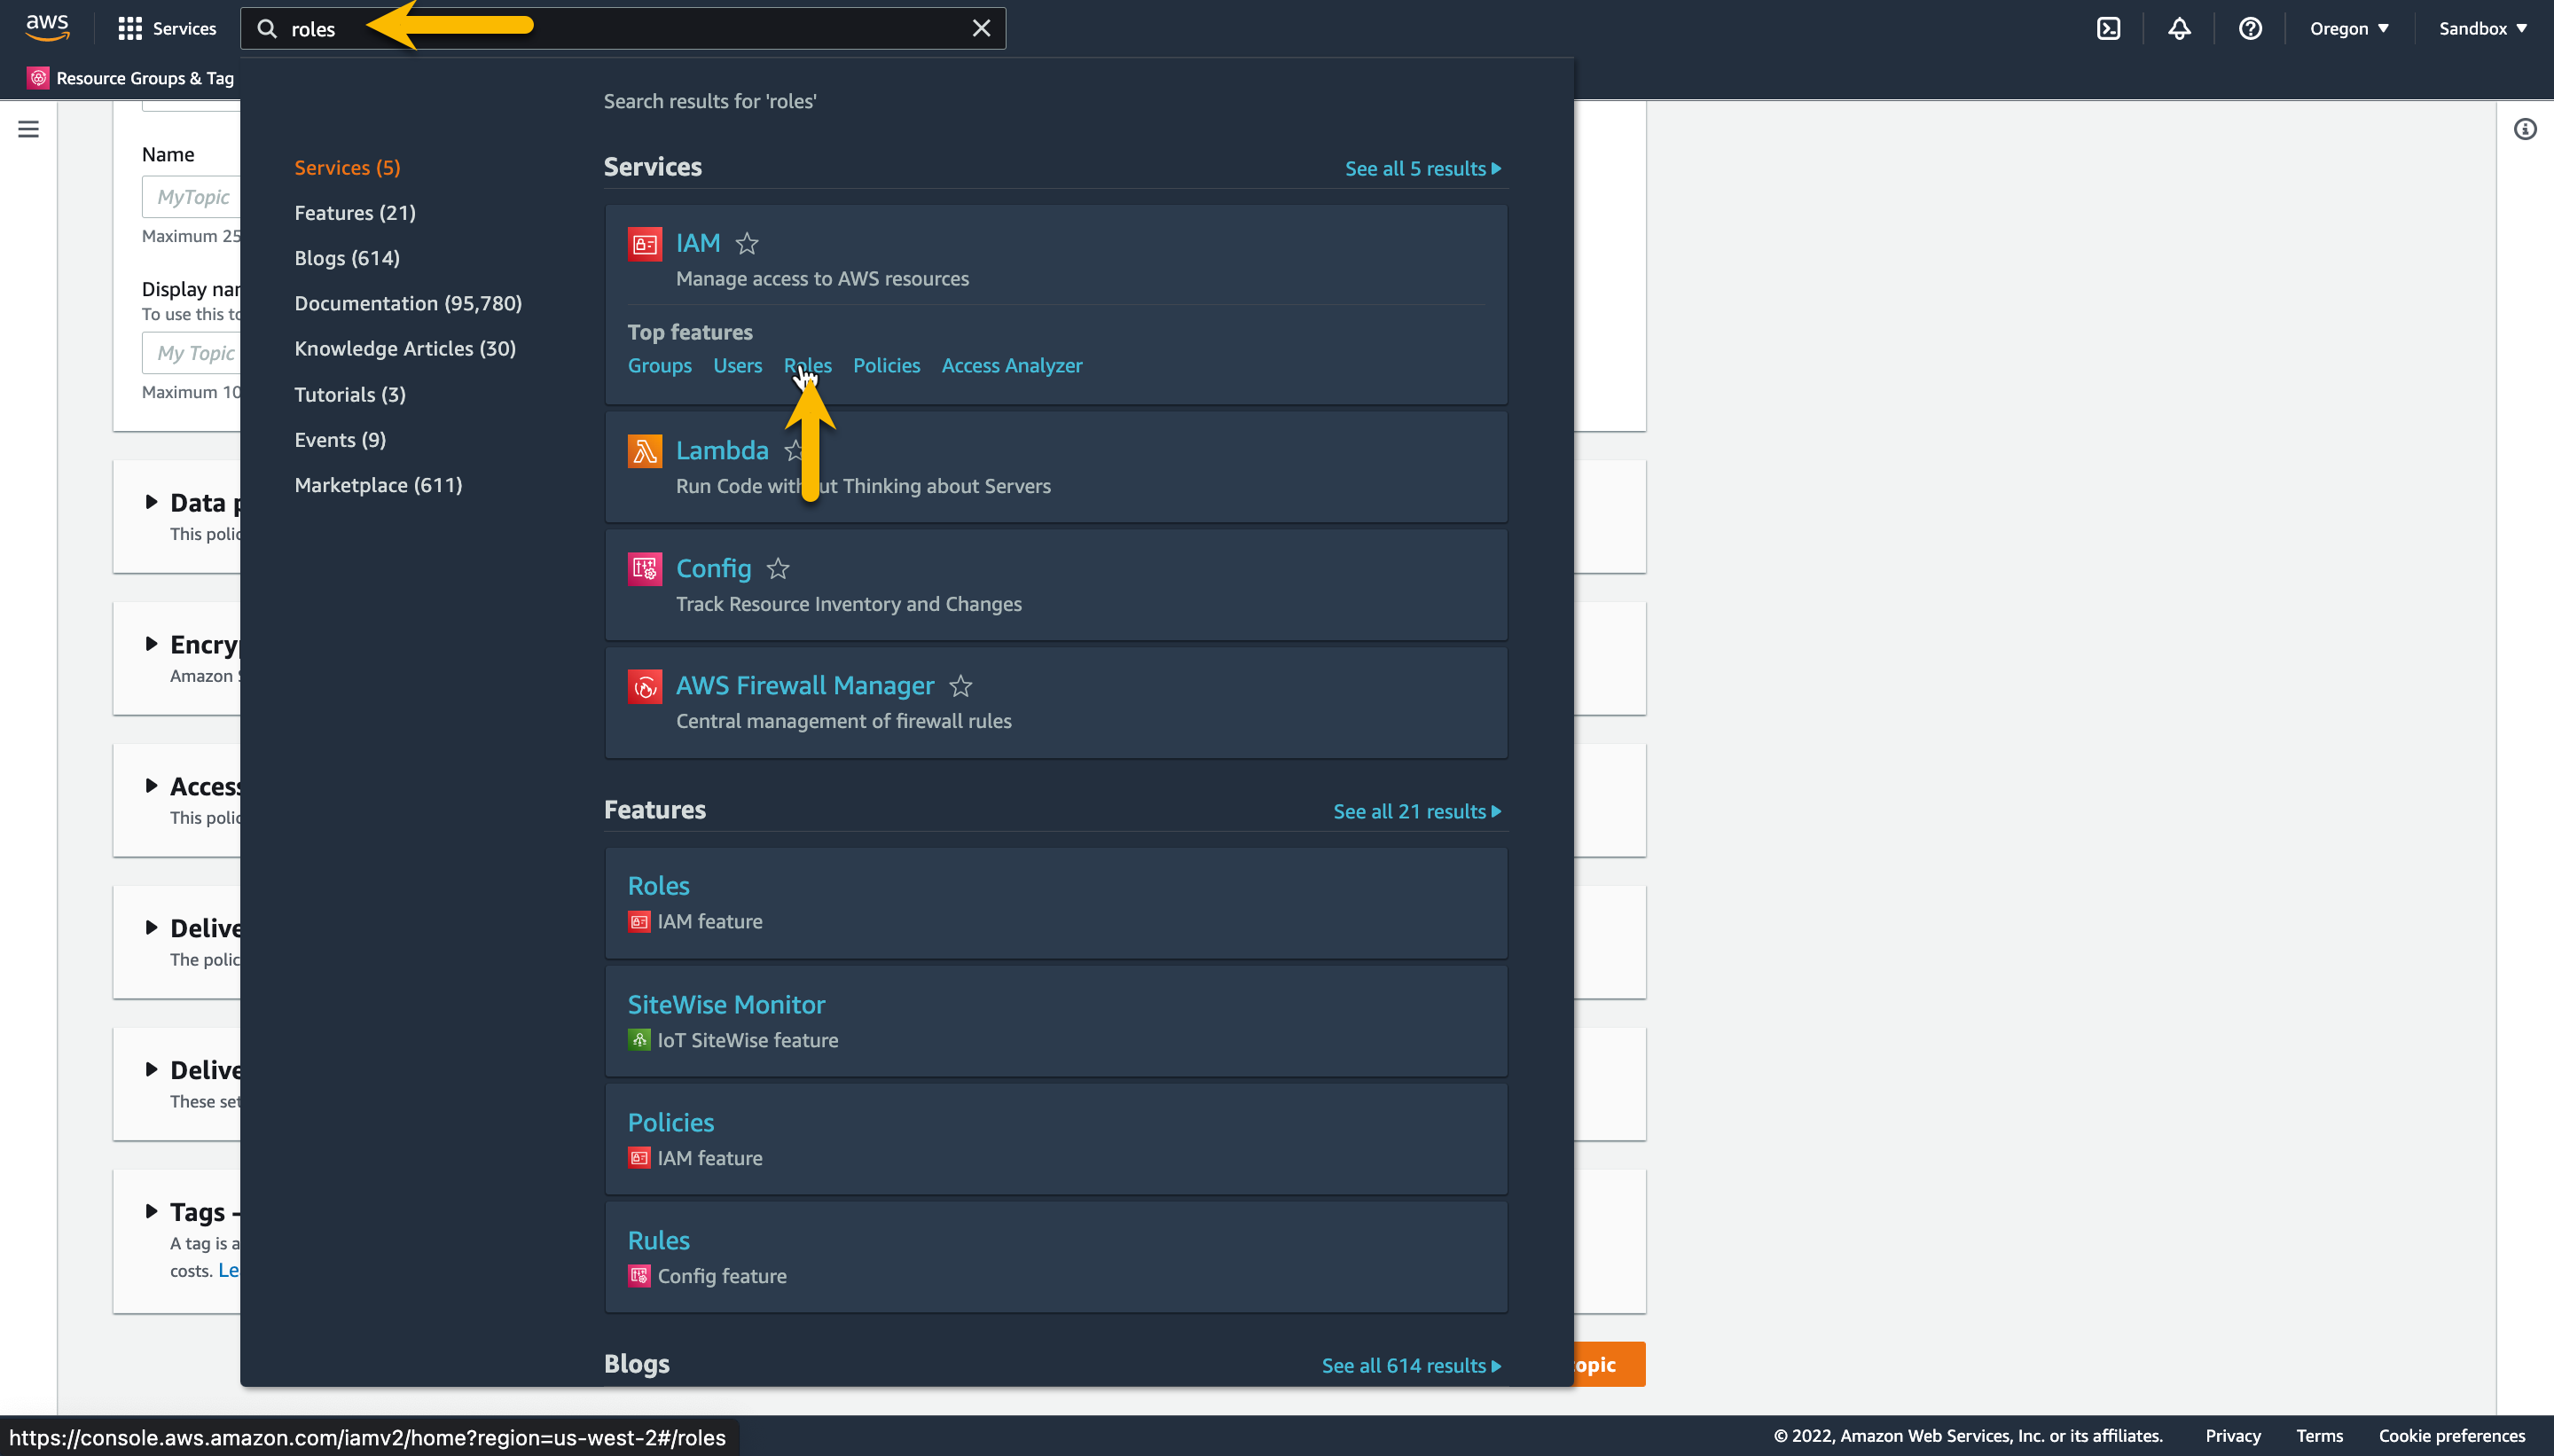
In the AWS Management Console navigate to the IAM Roles page by typing roles in the search field.
Select Roles under IAM
Time to create the AWS IAM role for Vectra, select AWS Account
Select Another AWS account, page fill in the following values, and click Next:
AWS Account ID - 580786928539 (Vectra AWS account ID)
Click Create policy, and choose the JSON tab
Modify the below JSON policy to include your SNS ARN and S3 bucket ARN
{
    "Version": "2012-10-17",
    "Statement": [
        {
            "Action": [
                "iam:ListAccountAliases",
                "iam:ListUsers",
                "iam:ListRoles",
                "cloudtrail:GetTrail",
                "cloudtrail:ListTrails",
                "cloudtrail:GetTrailStatus",
                "cloudtrail:DescribeTrails",
                "sns:Unsubscribe"
            ],
            "Resource": "*",
            "Effect": "Allow"
        },
        {
            "Action": [
                "s3:GetObject",
                "s3:GetBucketNotification",
                "s3:ListBucket",
                "kms:*",
                "s3:PutBucketNotification"
            ],
            "Resource": [
                "arn:aws:s3:::<MODIFY>",
                "arn:aws:s3:::<MODIFY>/*"
            ],
            "Effect": "Allow"
        },
        {
            "Action": [
                "sns:Subscribe"
            ],
            "Resource": "arn:aws:sns:<MODIFY>:<MODIFY>:<MODIFY>",
            "Effect": "Allow"
        }
    ]
}
Click Next: Tags > Next: Review
Give it a name *gts-policy-initials, and click Create policy
On the Add permissions page refresh, then select your new *gts-policy-initials policy.
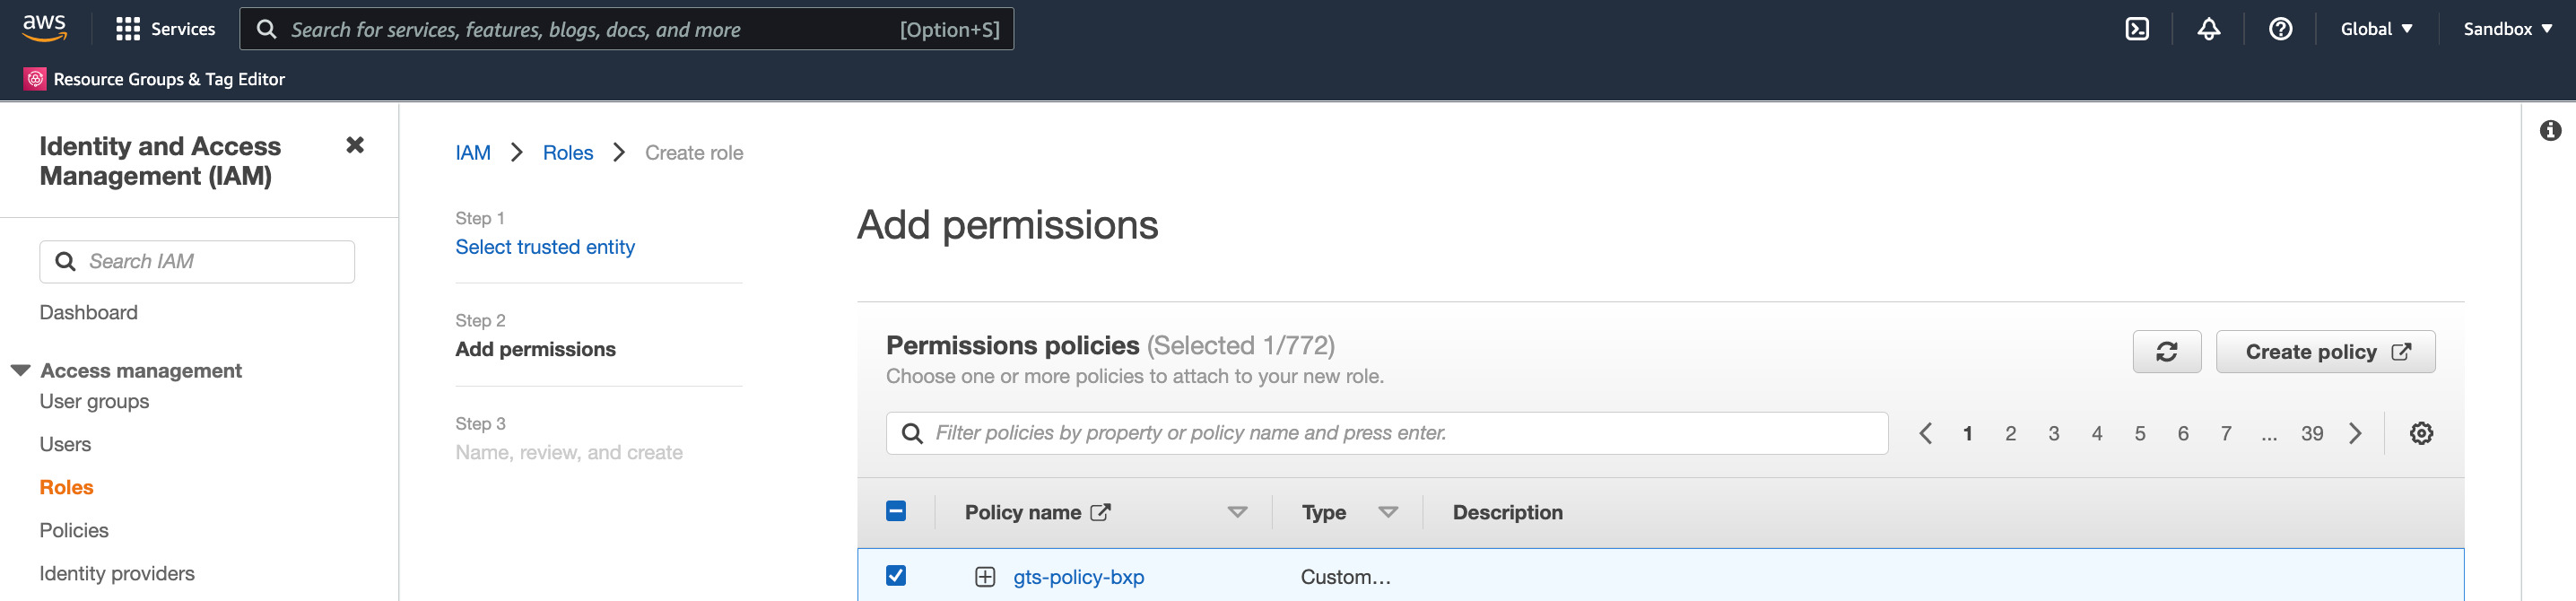
Click Next
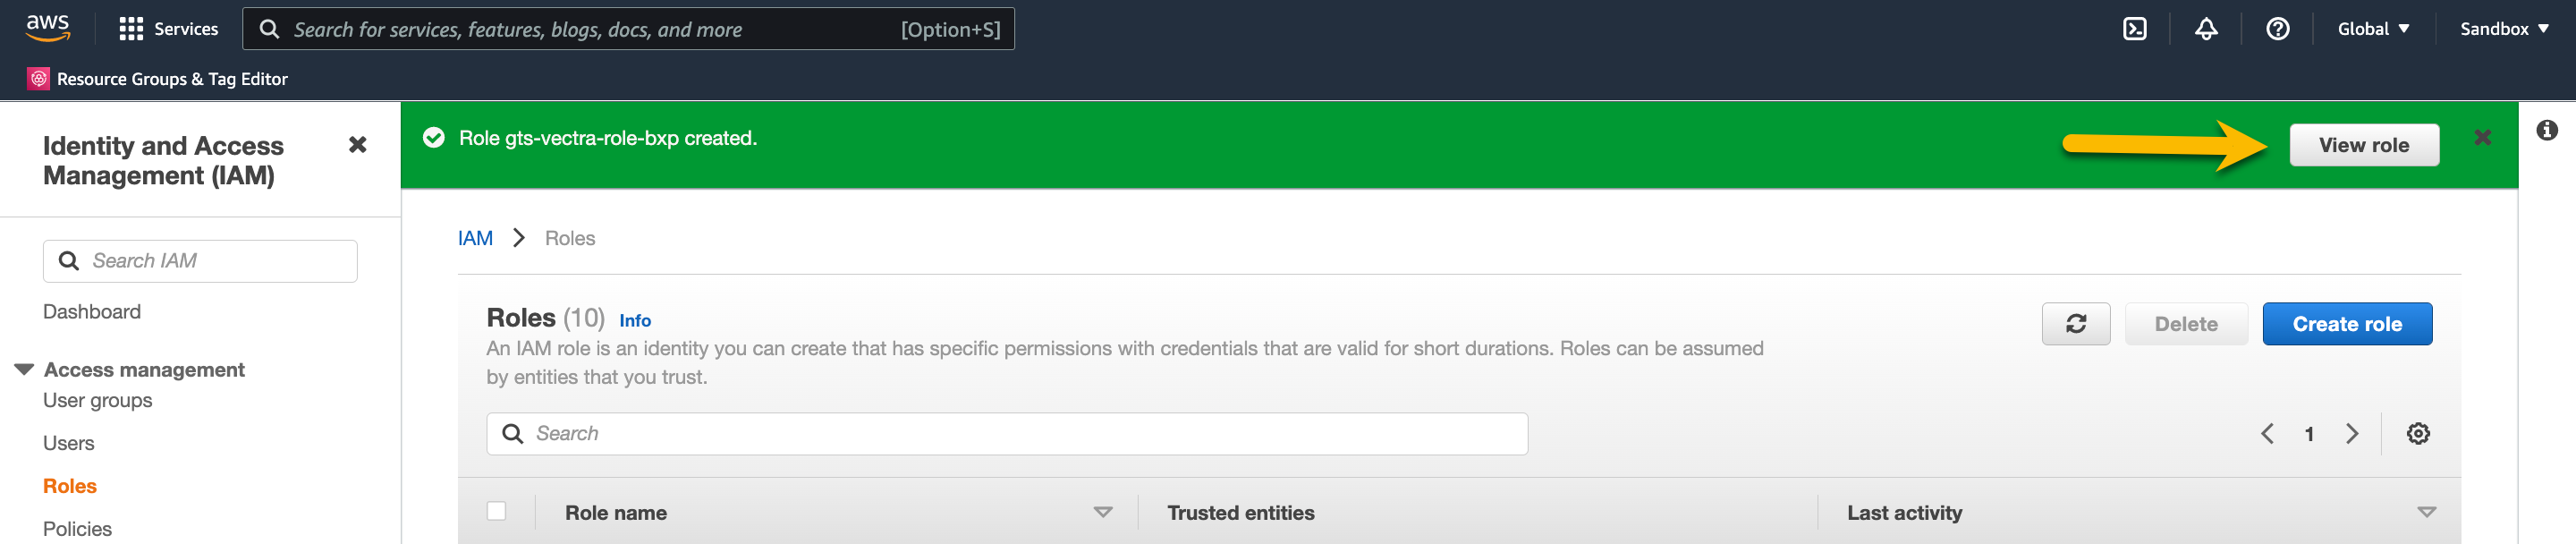
Name your new role gts-vectra-role-initials, and click Create role at the bottom right
Once the new role is created click on View role
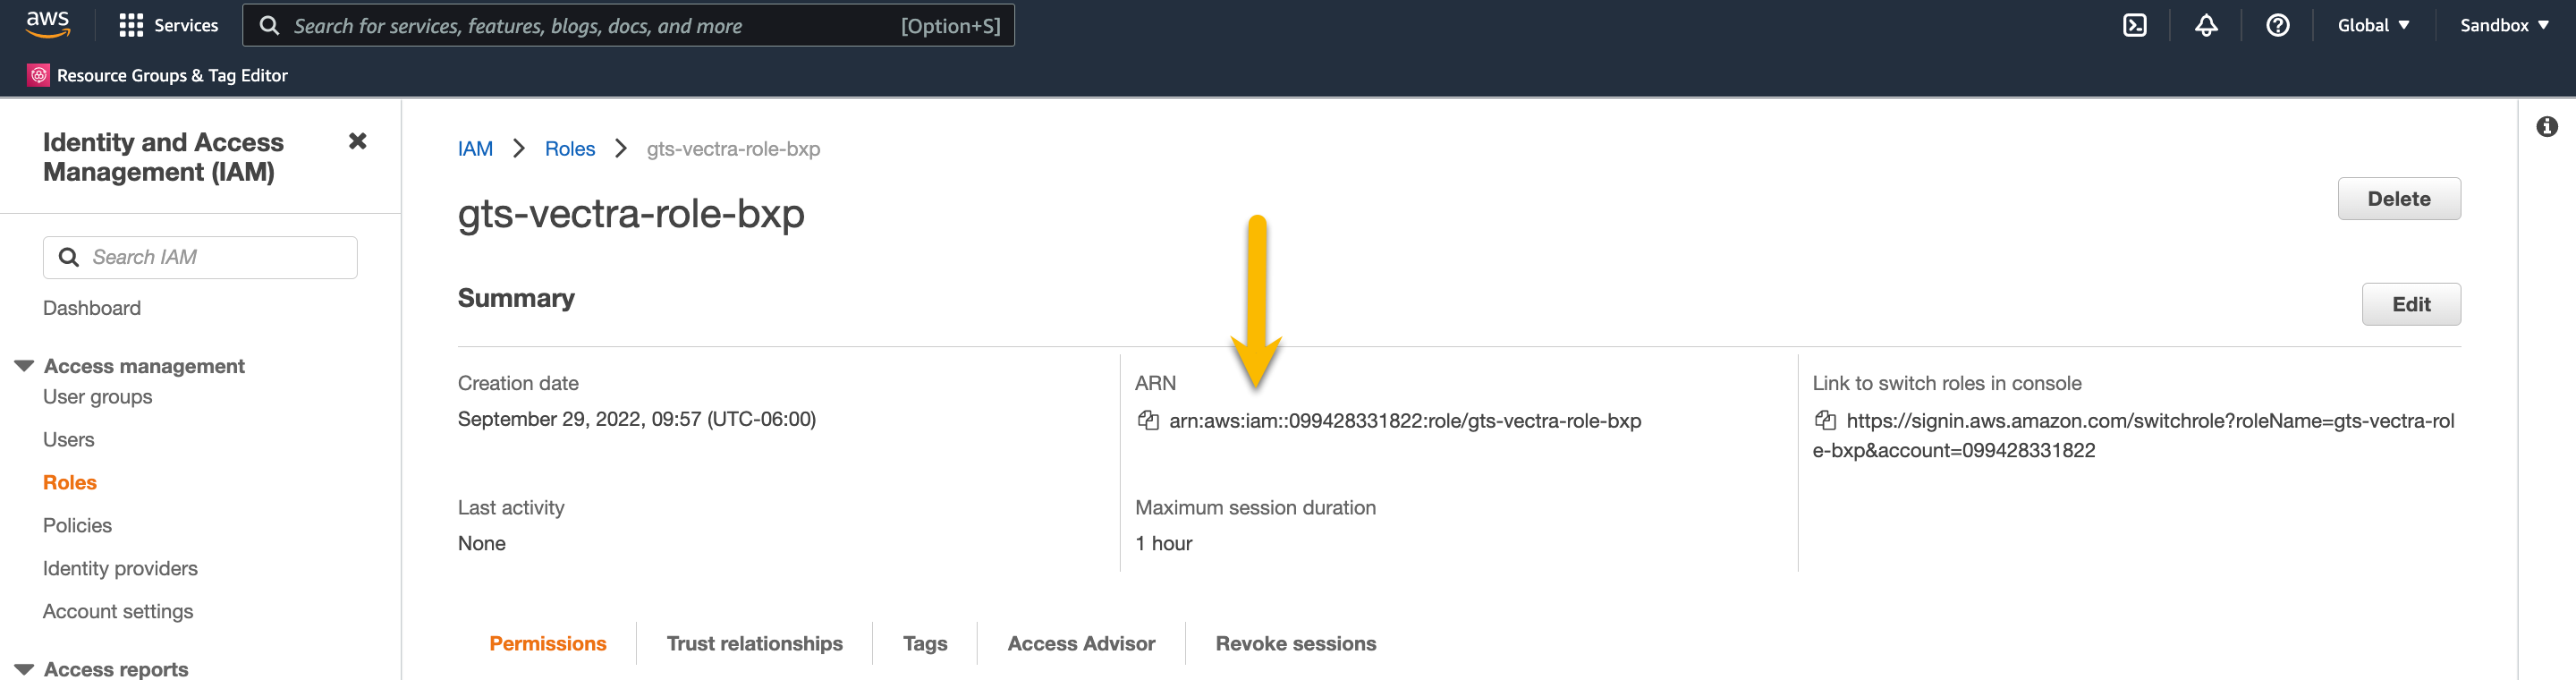
Copy the role ARN to your notes
Completing the Deployment in the Vectra UI
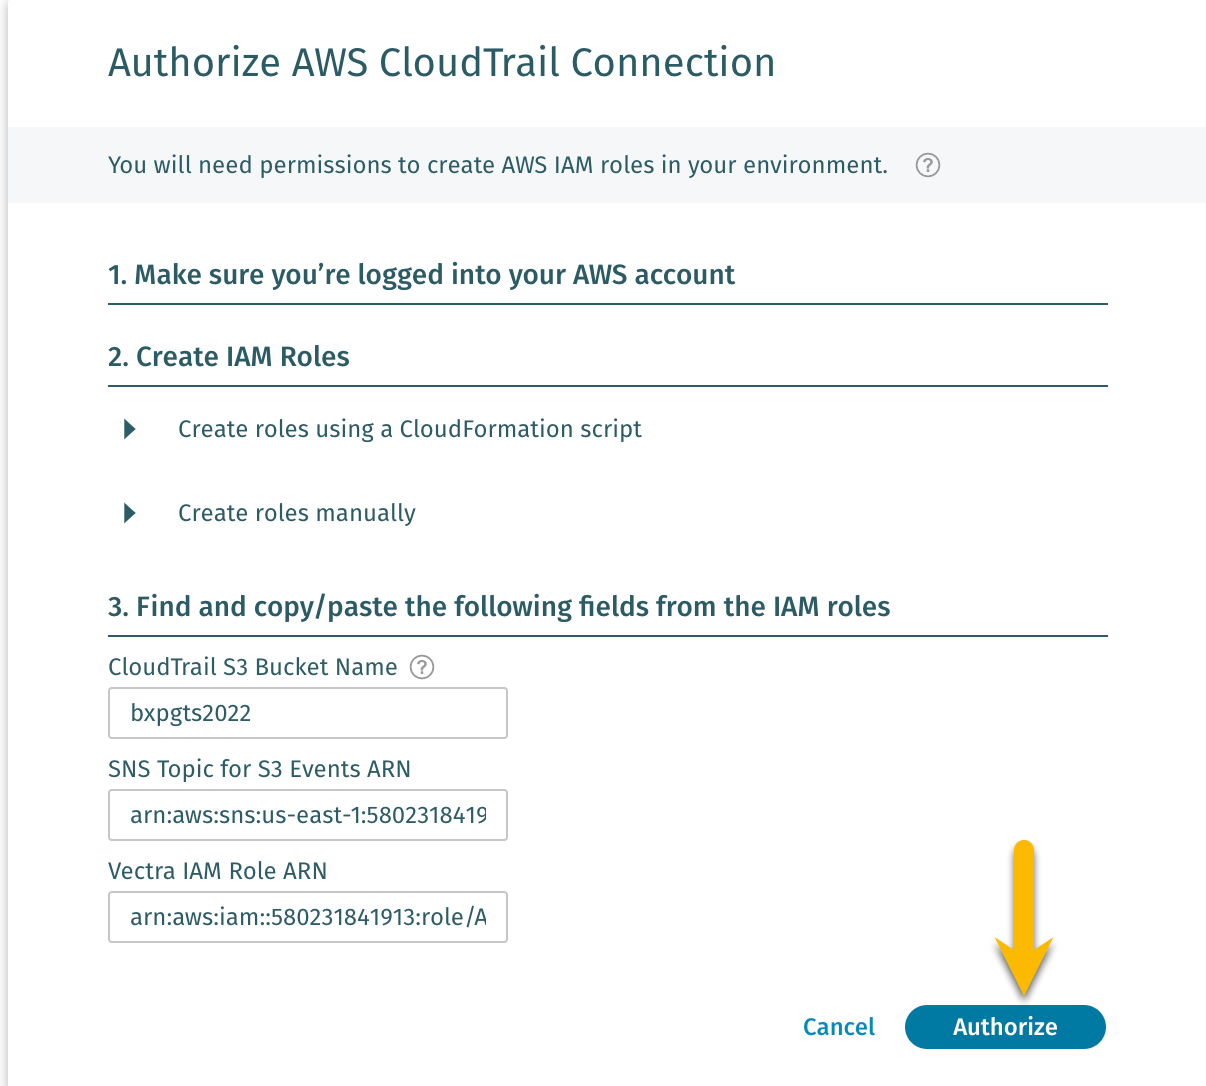
Go back to the DfAWS page, and paste the saved information into the fields
Click Authorize
You should now see Authorization in Progress in the DfAWS console.
Note: This can take up to 10 minutes to complete.If you followed the instructions correctly you will end up with an error “Setup failure”.
Note: This is intended for troubleshooting purposes.
Validation
Take a screenshot of the failed connection for verification

Continue to Troubleshooting Lab
Now go to Troubleshooting Detect for AWS and identify what your issue is. Once the issue is resolved you will need to create a new connection to the data source.